The Matilda Mae Welly Walk

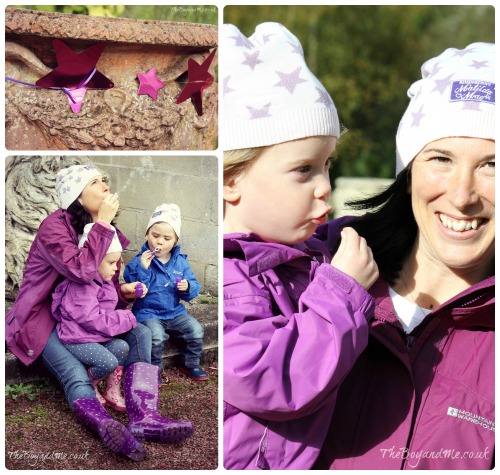
On Saturday 2nd November 2013, we had the pleasure of attending the Matilda Mae Welly Walk at Beale Park, Reading. It was a beautiful day to celebrate the life of a very special little girl who left this world too soon, emotional for her parents and all that knew her, but as the sun shone down and bubbles floated to the sky it would have been impossible not to smile as children of all ages shrieked with laughter.

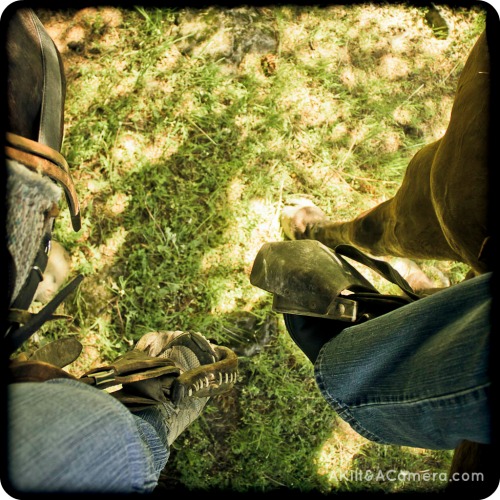
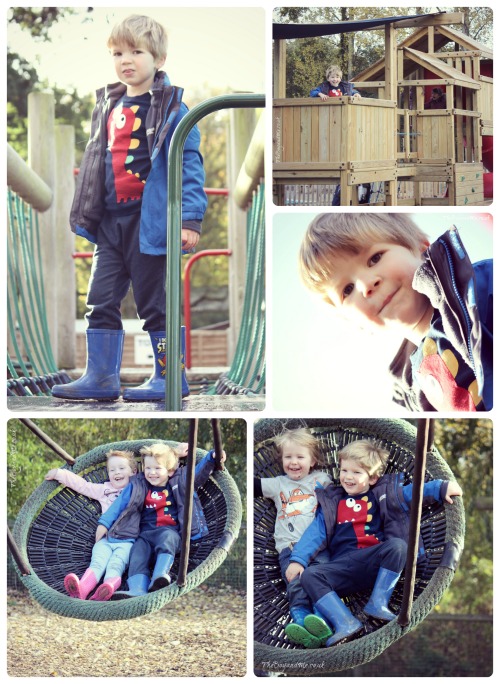
These photos tell the story of the day.

Matilda Mae Welly Walk 1

Matilda Mae Welly Walk 2

Matilda Mae Welly Walk 3

Matilda Mae Welly Walk 4

Matilda Mae Welly Walk 5

Matilda Mae Welly Walk 6

Matilda Mae Welly Walk 7

Linking with Country Kids

Making Bunting With The Cricut Mini

I was recently sent a Cricut Mini Personal Electric Cutter which is a rather exciting new craft toy, especially for me. Finding time for me to do some craft has been quite tricky, especially as I always seem to be coming up with new creations with The Boy, but I decided that Hallowe'en was the perfect time to explore what the Cricut could do.

So what is a Cricut?

A Cricut is a cutting machine, similar to a printer in the way that it transfers an image to paper, but rather than laying ink down on the paper in lines the Cricut cuts the paper where the ink lines would be. The Cricut website states that 'You can cut images and fonts on cardstock, vinyl, vellum, fabric, chipboard, and even thin foil at sizes as small as ¼" and as large as 11 ½".' There is an adhesive, A4 cutting mat which the material is pressed down onto in order to hold it in place making it easier for the rounded blade to cut it.

I decided to have a go at making a strand of Hallowe'en bunting to hang in the porch to show the local children we were prepared for trick or treaters (shame I didn't anticipate how many would call, and had to end up dishing out ten Smarties per child from The Boy's chocolate stash!).

The first step when using the Cricut is to install the software for the 'Craft Room', this then loads up an image of the cutting mat, along with the available 'cartridges' (designs and templates which the Cricut can cut out). There is a basic cartridge available with the machine which includes an alphabet, some basic seasonal shapes, one or two card and gift tag projects; certainly enough to be going on with for the novice Cricut crafter.

Mini-cricut cutter

Adding an image to the Craft Room is easily done by clicking on it, then resizing or rotating as needed. I decided to go for a simple pumpkin on orange paper with the letters spelling 'Hallowe'en' in the middle of each one. As these were to be stuck onto black card, the letters were going to be a negative space to provide a contrasting and striking effect. The Cricut cut all the shapes out with minutes and it was simply a case of carefully removing the letters.

The important thing about the Cricut is to adjust the settings for the thickness of the material being used, if it's not set for the right thickness then it won't cut all the way through effectively. Likewise, if the paper is too thin and the thickness is set to maximum then it can tear the edges. Luckily, I spotted that very quickly and a minor adjustment saw a perfect dye-cut through the paper and card.

Finally I glued the pumpkin letters onto the black card, threaded some green ribbon through the holes and hung it in the porch alongside a huge array of pumpkins.

Making Bunting With The Cricut

No wonder all the local children came calling!

I was sent the Cricut Mini Personal Electric Cutter for review, my opinions and ideas are my own and honest.

Poached Pear Cupcakes

I'm a big fan of the delicate taste of pears, and while I don't particularly like the texture of a raw pear, I do enjoy seeing how creative I can be with them in my cooking.

Poached Pear Cupcakes

Makes: 12
Preparation time: 30 minutes
Cooking time: 20 minutes
 
  • 1 litre/1¾ pints water
  • 200g/7oz granulated sugar
  • 3 small pears, peeled, quartered and cored
  • 1 cinnamon stick
  • 75g/2¾oz plain flour
  • 70g/2½oz ground almonds
  • 1tsp baking powder
  • ¼tsp salt
  • 115g/4oz unsalted butter, softened
  • 200g/7oz caster sugar
  • 1tsp vanilla bean paste
  • 1 eggs
  • 4tbsp double cream

Frosting & Decoration:

  • 150g/5½oz icing sugar
  • 225g/8oz unsalted butter
  • 1tsp vanilla bean paste
  • 1tsp ground cinnamon
  1. Bring the water and granulated sugar to the boil in a saucepan. Reduce the heat to low and simmer, stirring until the sugar has dissolved. Add the pears and cinnamon stick and simmer for 20 minutes. Remove the pears and set aside to cool, do NOT dispose of the liquid. Preheat the oven to 180°C/350°F/Gas Mark 4 and line a 12 hole cupcake tin with paper cases.
  2. Beat the butter and caster sugar in a bowl until pale and fluff, add the vanilla bean paste and eggs one at a time beating after each addition. Add a little flour if the eggs start to curdle. Sift in half the flour and the cream, beat until well incorporated. Add the remaining flour, ground almonds, baking powder and salt and mix through well.
  3. Spoon the batter into the paper cases and put a pear quarter into each. Bake in the preheated oven for 20 minutes until risen and golden. Leave to cool in the tin for 1-2 minutes, then transfer to a wire rack to cool completely.
  4. Sift the icing sugar into a bowl with the unsalted butter, and stir together. Add the vanilla bean paste and cinnamon, and beat until combined. Spoon the frosting into a piping bag with a star-shaped tip, and pipe onto the cupcakes.
  5. Reduce the poaching liquid down until it produces a sticky and slightly runny syrup, drizzle over the top of the cupcakes.

Poached Pear Cupcakes

This recipe comes from Make, Bake, Cupcake: The Recipe Book, which is a wonderful recipe book full of imaginative cupcake ideas for bored bakers. My personal favourites are the White Russian, Mudslide, Limoncello, Caramel Appletini, and Salted Caramel cupcakes. With easy recipes, colourful photography, and cute illustrations throughout, the book is a joy to use. I particularly like the way that the chapters are easy to find with cut out cupcakes as the markers.

Make, Bake, Cupcake: The Recipe Book is published by Parragon Books with an RRP £14.00 but is currently £5.00 on Amazon.

I was sent this product for the purpose of review, my opinion is honest and unbiased.

Linked to Recipe Of The Week, Tasty Tuesdays and Share Your Stuff Tuesdays.

365 #44

8 weeks to go and the nights are drawing in, but this is a wonderful time of year; scrunchy leaves, pumpkins, fireworks. Keep it up!

The 365 linky only works because of people linking to it and then contributing their thoughts to others' posts via comments. I can't emphasise this enough, it's the whole point of the linky!

Join in by entering the URL of your favourite photograph of the week (either a 52 or a 365 photo) and show some comment love to everyone else in the community. We've got a Facebook group, and now I've created a collaborative Pinterest board (if you'd like to collaborate, let me know and I'll add you).

  1. Choose your favourite photo from the past week and link it up below.
  2. Please add the badge to your linked-up post so that other people know how to find all the other fabulous entries.
  3. If you can spare five minutes to comment on a few other entries I know they'd appreciate it!
365


Days 300 – 306 of Project 365

300-306 of 365

2nd November 2013 (Saturday)

300. Glee (Pure joy as The Boy flings Autumn leaves into the air at the National Trust site of Tyntesfield.)

301. Town Planner (The start of our half-term craft and play project.)

302. It's High Up Here! (Standing aloft a bale of hay at Yeo Valley with Burton and Jenson from Mummy Mishaps.)

303. Landscape Architect (Continuing our craft and play project where The Boy initiated his first ever written word without any prompting; bottom left he wrote a label on the cardboard.)

304. Pumpkin Driller (Little boys who are four aren't old enough to carve a pumpkin, so we drilled holes in it instead.)

305. Five Dec-car (He wanted to make a five decker car. Because he's four and he can.)

306. Hold On (We were in Reading for the Matilda Mae Welly Walk in Beale Park, and went off exploring with Laura from Tired Mummy of Two and her family. This is The Boy and Elizabeth squealing with laughter while Tired Daddy of Two pushed them.)

TheBoyandMe's 365 Linky

50 Things To Do Before You're 11&¾ At Yeo Valley

Earlier this week, The Boy and I were invited to the wonderful Yeo Valley in the Mendips to work with the National Trust on their 50 Things To Do Before You're 11&¾ campaign. This was perfect for us as I've spent much of this year promoting the campaign through this blog and my outdoor play posts, and I also thoroughly enjoy visiting Holt Farm as it is a beautiful site.

Yeo Valley have partnered with the National Trust to help promote the outdoor play campaign, and during the course of the day we were given the opportunity to complete several of the 50 Things which The Boy thoroughly enjoyed. Many of these The Boy had already completed, however the one we haven't managed to tick off yet is 'hold a scary beast'; we did complete it when I placed a worm on his hand. It may not seem very scary to you or I, but to a four year old who doesn't like slime, it was a terrifying creature!

50 Things at Yeo Valley

We had a great day in a wonderful setting with good friends. And what better proof is there of the fresh air being good for you than The Boy falling asleep on the way home?

From October to January this year, Yeo Valley fans can win one of ten fantastic holidays each worth £1,000 on special packs of its natural and fruity yogurts. Simply pick up a big pot or one of its 4-pack varieties from any major supermarket, visit the Yeo Valley website and enter the code on the pack for the chance to win one of ten unique breaks to a magical National Trust cottage, for a tranquil ‘staycation’ in spectacular locations across the country. In addition to this fabulous offer, Yeo Valley is giving away 250 family passes every day, giving families the chance to experience the National Trust’s enchanting places absolutely free of charge.

country kids

flashback friday badge

Orchard Toys: Christmas Surprises (Review)

christmas banner small

Orchard Toys have released another winning game which will be perfect to play to help build up the excitement in the run-up to Christmas. And the best thing is that there are two games in one box!

Orchard Toys: Christmas Surprises

The two games in Christmas Surprises use the same game boards and are of the simple dice and collect a counter style; easy and inclusive for all family members over the festive periods. The box includes four double-sided game boards, a set of 24 shaped coloured bauble pieces, a set of 24 shaped (and double-sided) present pieces, a coloured dice, and a shaped dice.

Christmas Surprises is aimed at children from 3-6 years, although I think this could be extended either side depending upon your child's ability level and enjoyment (although as it contains small parts it is technically not suitable for younger children, so they should play it under close supervision), and focuses in two parts on both colour and shape recognition.

Orchard Toys Christmas Surprises: 'Colour Matching Game'

Orchard Toys: 'Christmas Surprises' Coloured Baubles

Very simply in this game, the coloured 'baubles' are laid out in the central playing area face up, with a game board in front of each player (2-4 players recommended). Players take it in turns to roll the coloured dice and collect the corresponding coloured bauble, placing it on their game board. Not only is this good practise for matching the colours between the dice and the baubles, but in theory it's good practise between the baubles and the board.

And I say in theory because unfortunately this is where I need to point out the only slight criticism I have ever made of any Orchard Toys product. The blue on the dice is the same shade as on the bauble counter, but unfortunately on the Christmas tree it is more of a purple shade. And a similar problem arises with the purple; the shade on the game board and the bauble counter is identical, but it's a slightly darker shade on the dice. Essentially the purple on the dice is nearly the same shade as the blue on the game board.

It is a minor issue, and once I explained to The Boy we haven't had any problems at all. But it could be a little confusing for younger children, so something to ensure is explained properly when playing. Nonetheless, we really enjoyed playing this game as it is simple, quick and very attractively designed.

Orchard Toys Christmas Surprises: 'Shape Matching Game'

Orchard Toys: Christmas Surprises - Christmas Presents

The shape-matching game is a little more complicated than the colour-matching one, and therefore would be suitable for the older age in the range.

One the reverse of the game board is a picture of Father Christmas holding a sack with shaped spaces in it. The 24 shaped present counters are laid down on the central playing area with the picture side down and the wrapping paper side facing up. Players take it in turn to roll the shaped dice, identify the shape and select a shape counter to put on their board, each shape counter has a different 'present' on the back so it really is a surprise what Santa will have brought! The counters mustn't be peeked at but placed wrapping paper side up on the board. The winner is the first person to complete their board, and when all players have finished then the 'presents' can be turned over and revealed.

This is the aspect of the game that The Boy found most fun, we even had a little swapping of presents between contestants as he preferred the remote controlled car to the pull-along duck, and Mr. TBaM was most amused to see there was even a Shopping List game as one of the presents. Nice touch Orchard Toys!

The shape-matching game was far more fun to play with The Boy, it has a little more challenge to it than the colour-matching game and the whole concept of finding out the presents from Father Christmas was very enticing. We extended the game by referring to the diamond as a rhombus, and the rectangle as an oblong (did you know that 'rectangle' is the shape family name, and oblong is the specific shape? And that also a square is a rectangle? Trust me, I'm a teacher!)

The educational guide suggests the games develop:

  • social and observational skills
  • memory dexterity
  • and link with Early Learning Goals.

I'd add to this:

  • mathematical skills (colour recognition is first stage pre-school maths)
  • language development (oracy through discussion of the presents)
  • and it can also lead to Religious development (discussion of the ways different faiths celebrate major festivals, what is Christmas?)

Both of these games were so fun and simple to play with that they are the new favourite in our house at the moment. When I ask The Boy which he prefers he points to both. I try again and ask him to choose which he would play if he could only play one; he points to one first and then the other straight after. To him they are just as fun as each other, and surely that's the point of any educational game? If the child isn't enjoying them, then they aren't gaining anything from it.

Orchard Toys: Christmas Surprises is available exclusively through Tesco (not the OT site) for the price of £9.50. Excellent value for two games in one! (And don't forget to collect clubcard points on it too!)

I was sent this product for the purpose of this review, my opinion is honest and unbiased.

365 Photographers: A Kilt & A Camera

In the run-up to the launch of the 365 linky back in January 2012, I was nervous that no-one would join in. I bullied some blogging friends to give it a go and support me, and they came through, which was a big relief. Many of the blogs, I'd already heard of and most of the others were UK parent bloggers, however one or two people who linked came as a complete surprise.

Like Peg from A Kilt & A Camera.

A Kilt & A Camera

Peg is not a British parent blogger. Peg isn't British. She's also not a parent blogger.

What Peg is though, is a wonderful American lady who, with her ruggedly handsome and Scottish husband, has spent quite a lot of time in the past few years travelling the world. In the past 22 months since Peg's been linking up (when her travels allow her!) I have seen the wonderfully tropical life she had in Brazil be swapped for one in Newcastle, England. Seeing her 'From Where I Stand' photographs change from those of bare and tanned feet on a beach to ones of hiking boots on a snowy hillside, or the glistening-wet cobbles of Edinburgh amused me greatly. And they kept me captivated and hankering after more and more of her photography.

Having someone so removed from my own life and experiences join in the 365 linky was a surprise but a complete joy, and I must confess that I love spending time once a month catching up on her travels and life through the lens of someone on a completely different continent.

Which is why I've had such difficulty narrowing down my selection of the favourite photos by Peg, but here they are.

A Kilt & A Camera 1

Peg and her husband started 2012 in their sunny paradise of Brazil, visiting friends in the forests and mountains, and walking barefoot on golden sands. The Hockney-esque splash from an aquababe in the photo on the left with the small waterfall in the background, and sunkissed toes, is wonderfully tropical. The angle of the photographs in the 'From Where I Stand' series always makes me feel that I am the person taking the photograph, I'm in the scene and witnessing what the photographer is. I've chosen the red post box purely because seeing it in her photostream on flickr amuses me; such a contrast from the start of the year.

A Kilt & A Camera 2

For 2013 Peg decided to try a new theme of 'Through'. While I know that she found it quite challenging at first and missed the FWIS theme, she soon started to fly with the possible interpretations. I've chosen these two photographs because they show how in the past two years, her life has almost come full circle; the one on the left was from the start of 2013 and taken in Shetland at a Viking festival, the one on the right is back in Brazil (albeit a different city) where the travelling twosome have returned once again. (And no, I don't have a thing for Peg's feet, although they are very pretty.)

These are Peg's favourite six from her two years of Project 365 so far.

265FWIS

11/02/12 – Our very own beach, just steps from our apartment when we lived in Rio das Ostras, Brazil. Oh, how I miss this beach!

266FWIS

20/02/12 – Hammock Life. We spent many an afternoon nap listening to the sounds of the Atlantic Rainforest here at our friend's "country house" outside Rio de Janeiro.

267FWIS

16/05/12 – Ready to Ride. A beautiful springtime ride in the forests surrounding Mt. Rainier in Washington state.

269FWIS

14/10/11 – Ride! Taking a photo of my feet in action while riding a bike along the streets of Amsterdam earned me a few odd looks, but it was worth saving the memory. Luckily I didn't ride into anyone!

262Through

15/01/13 – Through Winter Branches and Snow. This fountain lived outside the window of our flat in Newcastle, England. It was our  weather indicator in a climate that changed daily.

263Through

28/04/12 – Through Barbed Wire. A very common example of home-security in Jundiaí, Brazil. We see this surrounding many of the houses here in our new city.

  • When did you start doing the 365 photo project, and why?

I had several photographer friends who had taken on 365 projects of their own, but for the longest time I balked at the idea. I tend to be a bit flaky and commitment phobic, and have a hard time sticking with projects to the end, but I really liked the idea. On New Year's Eve of 2011 I came across another photographer who had been doing a daily photo project for nearly two years, and I loved her theme. That's where I first heard of "From Where I Stand" (#fromwhereistand) and instantly loved it. I knew we would be traveling quite a bit for the upcoming year, so I had a chance of finding new and exciting locations, and no matter where I was, I always had my feet with me. I decided to start the very next day, on January 1st.

  • Why did you decide to continue the project for a second year?

I absolutely loved how the project had become a daily journal of sorts, and documented what turned out to be an epic year for us. I have photos from five different countries on three continents, and one or two from somewhere over the Atlantic Ocean on an airplane. I can look back at those photos and remember exactly where I was, and sometimes who I was with. Most of my friends got used to me rounding them up to get their feet in my photos. I quickly learned to explain what the heck I was doing in two languages.

I changed my theme after the first year from "From Where I Stand" to "Through", and have enjoyed the challenge of finding ways to take a photo which represents the theme. I do miss my "FWIS" photos though, and I think I'll pick it up again for next year.

  • What's the best bit about doing a 365 photo project?

It's a great way to remind yourself to pay attention to where you are, and what's around you. Too often I find myself floating through my days and not really seeing how lucky we are. To stop and find something to commemorate makes me realize how much I have to be grateful for.

  • Are there times when you've wanted to give up, why? What kept you going?

There have been quite a few days when I have no idea what to shoot, or how to get creative when it's 10pm and I've forgotten my shot for the day. Those are the days when I tell myself to just skip it, and make it up tomorrow, but I know myself. Once I go down that road I have been known to "forget" for days at a time. I've had to discipline myself a bit to make sure I'm on top of it. Having a theme I loved really helped, and as much as I'm enjoying the creativity of the "through" theme, I'll be glad to get back to "FWIS" next year. It was way more fun.

  • What tips would you give to anyone who wants to start a 365 project?

Like I mentioned above, find a theme you love! If the project is fun, and you have a good time doing it, you'll be much more likely to stick it out. You'll also really love looking back through those photos to remember the moment you took them. It doesn't matter if it's your feet, your dog, sunsets, water, or your vegetable garden, if you're really enjoying the project it won't ever feel like a chore.

  • Anything else you'd like to add?

Don't forget to go back and look over those photos. Brian and I still have a great time looking through ours from the last two years, and it never fails to get us talking about great times we had, and good friends we've enjoyed spending time with.

What would your 'From Where I Stand' photo from today be?

Please pop back next Thursday when I introduce you to the only dad who's been 'man' enough to take on the 365 Project in two years: OneDad3Girls.

In The Woodshed (#SundayPropShop)

Throughout the past fifteen or so years, there has been an infiltration into both my own, and my parents' house.

Wood is creeping in. Very slowly.

Our wedding present from my dad was a large block of wood, and I've got several others lying around as well with various purposes.

But these aren't just rough lumps of wood, because quite frankly that would be very odd. These have been carefully nurtured into wonderful creations; the texture and natural shape of the wood shining through the hewn branches. And you might occasionally see these creations in my blog posts, with cakes or quiches adorning them, or pinecones and orange slices scattered across the top.

In The Woodshed 2

These are created inside the purpose built workshop that my dad has at the bottom of their garden. And it's quite fascinating inside.

In the woodshed

SUNDAY-PROP-SHOP

Related Posts Plugin for WordPress, Blogger...