The Gallery: Home
I've lived in four different properties in my 34 years, but up until August 20th last year only one of them was 'home': the house that was my childhood home.
My parents' old house was the home that I was welcomed into by my elder siblings when I was brought home from the hospital at a few weeks old. The four-bedroomed Victorian property was quite large and suited the six of us well. With my eldest brother being twelve years older than me, there was a hierarchy of bedrooms as and when people moved out. Eventually I had the prize possession: the room with the balcony down to the garden, with the original coving, picture rails and skirting (from 1889) and the huge wall of windows looking out onto the garden.
I moved out of that house when I was 23, the day after I found out the results from my degree. My (then) fiancé whisked me away up to Reading to start our new life, and four months later we were married. Our first home was a two-bedroom rented flat which was lovely and spacious. After being there a year, we bought a three-bedroom ex-council house nearby which was cwtchy and we were both very fond of.
However, the yearning for my home-town was kicking in and I was getting more emotional each time we had to leave my parents' house after visiting them. We took the decision to move and start again back here, in the town that I grew up in with friends and family nearby. Three years almost to the day after I left, we moved back into my parents' house, this time with the contents of our three-bedroomed house.
It was hard-work living back with my parents after three years of independence and 'growing up' but I'm so grateful to them for giving us the opportunity to stay rent-free for a year and a half while we set up our new house. We've owned this place now for nearly seven years and have lived in it for six years. However, it wasn't until my parents moved out of my childhood home last year that this really became 'home'.
My parents' house held many happy memories for me over the years, some not so great, but the vast majority were magical. I could look at any room, any square foot and a wealth of memories would come flooding back to me: play-fights, real fights, birthday parties, Christmases, etc.
These photos were taken on the day that my parents moved out. I was the last person to leave and shut the front door, and I sobbed.

What I've realised since is what so many others may know; home is not a building, it's the love that is shared and memories that are made within.
—
Pop over and check out the other entries into The Gallery by clicking the widgetty doo-dah below
The Grass is Always Greener!

That's pretty isn't it?
NO!
I always thought I had a nice lawn but according to the lovely man from Green Thumb just because it's green doesn't mean it's a good lawn. So look at that picture and tell me what's wrong with it?
If you guessed that 75% of it is made up of clover, you'd be right. If you also guessed that there is a further 10% of other weeds in it, you'd be right. Now I'm no mathematician but even I can work out that that leaves me with only 15% of my lawn being grass.
As a part of the Bosch Garden Makeover Challenge, we will receive two lawn treatments. Which, quite frankly bearing in mind what the lovely fellow from Green Thumb told me on Friday, is just as well! I never knew that lawns were so complicated. Surely you just keep them watered and mown? No, no, no! You also need to aeriate them (which they did for me), scarify them (!) and preferably give them some lawn treatments. Many of the DIY lawn treatments just kill the leaves, the Green Thumb treatments get right to the root of the problem (ha, see what I did there?).
I expressed my concerns that in four weeks time, the lawn would look a little naff to put it bluntly, but I was reassured that whilst that may happen temporarily, the fertiliser that they put down would help the grass to grow.
Green Thumb recommend four treatments a year and at only £15 (starting price) a time, I think that's quite good value for money, especially to have the ability to walk barefoot in emerald grass in the summer.
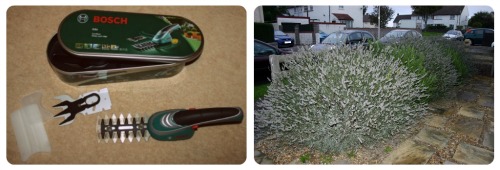
Meanwhile, our tools from Bosch have arrived. I love gadgets and we have two new ones! A cordless strimmer for Mr. TheBoyandMe to use, and an Isio Cordless Shape and Edge (for me, although hubby is having kittens with my safety: I'm known for saying, "I'll be fine" and then cutting myself).
Now, Mr. TheBoyandMe need not worry because while I am a klutz, I'm not a complete idiot with garden tools (that's why I've chosen him a cordless strimmer), and neither are Bosch. The Isio Cordless Shape and Edge is really nifty and has a brilliant safety catch on it which means it stops if you release the pressure on either of the switches. It also has an edging tool for the lawn which is going to save hubby from having to manually cut them with shears and comes in a nifty metal storage case. I'm going to test it out on the lavender and rosemary bushes that line the drive, I've left it until now so that the bees get their fill of them, but now they are gargantuam.
Wish me luck!
Flexibath (Review)
When we went on holiday at the beginning of August, I wrongly assumed that the family-friendly self-catering apartment we were staying in would have a bath in one of the two 'bath'rooms. More fool me! We ended up having to buy a big plastic tub from a supermarket for him to bathe in; it was neither practical nor comfortable.
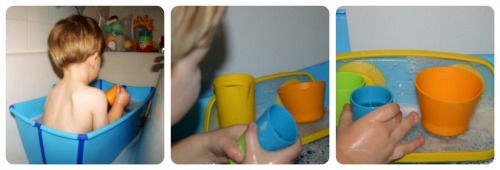
When we were given the opportunity to review a Flexibath a few weeks later, I almost jumped for joy because we were due to spend the weekend in a chain hotel which I knew didn't have a bath. I cannot even begin to tell you how much of a stress-saver the Flexibath was! It fitted perfectly into the shower cubicle, filled up within two minutes and was compact. The accompanying bath toys were perfect to keep The Boy amused and entertained. It folded flat and stored easily in the car, taking up minimal space amongst the vast array of other items that such a small being needs!
Since that weekend a month ago, the Flexibath continues to be The Boy's bath of choice. He has a bath every other night and we used to fill the 'big' bath up with six inches of water; enough to cover his legs etc. and keep him warm but not too much to waste water. However, The Boy now chooses to have the 'little' bath 90% of the time. He has had no more than two baths in the 'big' bath in the past month.
For my inner eco-warrior, this is excellent news. We've measured and calculated the water. We fill the Flexibath up with 15 litres of water for The Boy, which provides the same depth of coverage as in the normal bath. The normal bath requires 60 litres of water for this!
So can you do the Maths? Over the past month, we have saved 630 litres of water!
The reasons why we love the Flexibath:
- it folds flat and is stored easily
- it uses a fraction of the water normally needed to bath a child
- it has a non-slip base
- there is a very-snug fitting plug to empty the water out (although we tend to scoop it out & water the house plants!)
- it's bright and attractive
- it is an essential for holidays!
As I've mentioned, Flexibath have introduced a set of bath toys to accompany the bath. These consist of a clear plastic shelf with suction cups for adhesion, a coffee/tea making set with colourful cups, jugs and a funnel. The toys which are soft and fun to play with, are made from the soft plastic used in the bath. They also work as probably some of the best bath toys that he's played with in the 'big' bath.
At only £29.95 for the Flexibath, and £13.95 for the bath toy-set I think these are essential additions for any trip, or eco-warrior who is conscious of the amount of water used at bath-times.
I was sent these items for review. My opinions are honest and unbiased.
Tuesday 27th September 2011 – 'Flyaway' (269/365)

YumYum in my TumTum! (Review)
I think sitting down together at teatime is a really important family activity as it teaches your little ones so much; social skills, conversational skills and how to behave at the table. I think it has contributed to The Boy's ability to sit at the table happily for over half an hour eating alongside us.
Recently he's shown a massive development in his ability to feed himself with a fork and spoon, but is starting to show an interest in using a knife. I've looked around and most sets that are available for his age bracket and hand size don't have knives in them. Therefore when we were asked to review a cutlery set by the lovely people at TumTum, I jumped at the chance!
They sent us the TumTum Tiny Double-sided Cutlery Set (which has a handy travel case for when you're out and about) and were very generous in also sending us the TumTum Tiny Dining Set (with scooping corners).
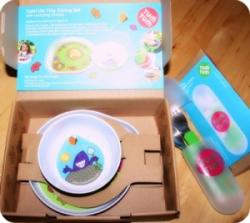
The cutlery has a very clever and engaging mix and match the double sided handles to change the character, with a good bowl shape on the fork, a straighter edge on the spoon, and most importantly the knife is not too sharp and is angled for easy cutting (stabbing in The Boy's case!). The dining set has a beautiful autumnal design on the plate of a hedgehog sweeping leaves, while the bowl has a mole digging in the sun. Most importantly about both of these is that they have a scooping corners which provides a stopping point to allow peas, beans and any other 'round' food to be easily loaded onto forks or spoons. There's also a fabulous rubber rim on the bottom to stop it sliding around! Both of these products are BPA, phthalate and PVC free, and dishwasher safe!

As you can see, The Boy absolutely adores them and he feels so grown-up eating from them. The pattern on the bowls is also an incentive to get him to eat because he has to clear the food out of the way (by eating it of course) before he can see what the picture is! This meal-time, he's just put the fork and spoon together and 'baa-ed' at daddy! Most amusing!
The double-sided travel cutlery set retails for £12 and the tiny dining set with scooping corner is £14.
We received these products in order to review. My opinions is honest, as always.
Tanatomicals
Apparently, we're due to have a heatwave later this week. Yeah right, like we did in August? If we do, it will be your last chance to get a tan (safely!) before the sun comes back to see us next year.
It's not going to happen though is it?
Therefore those pale and pasty people like me are going to need a little help to stay looking healthy, alive and not like a zombie. Help in the form of fake tan.
Which is lucky because I've recently been sent some of the products from the new range by Tanatomicals, a fab and funky fake tan range exclusive to Superdrug.

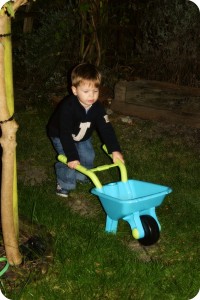
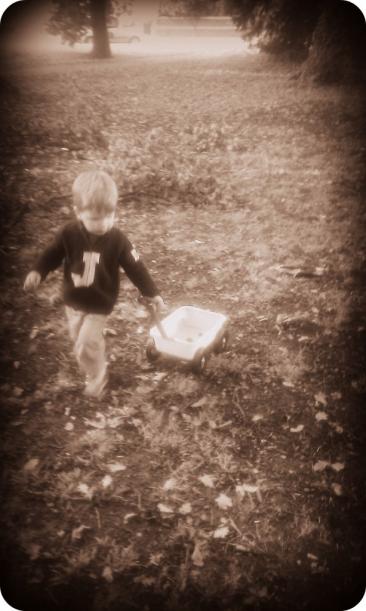
Monday 26th September 2011 – 'My Wagon' (268/365)
Courgette and Chocolate Cake
Last Summer I went to a picnic meet-up with my baby and toddler group. One of the mums had brought along a courgette cake which I wasn't at all keen on trying, but actually tasted really nice. I've had it at her house a few times since and it is really quite scrummy. The one thing that I noticed it is that although it's moist, it is actually quite bland. The courgette doesn't really come through and therefore the cake just tastes of, well, cake.
I decided to have a go at making this with The Boy this morning, and had the idea of adding chocolate to give a contrasting flavour. I knew I had the ingredients and there were courgettes waiting to be used up in the fridge. Only, they'd gone too far and had to go into the compost, which is when Mr. TheBoyandMe was despatched to pick up more!
Courgette & Chocolate Cake

Ingredients: 220g plain or wholewheat flour, 2 teaspoons ground cinnamon, 1 teaspoon salt, 1 teaspoon bicarbonate of soda, 1 teaspoon mixed spice, ½ teaspoon baking powder, 250g sugar, 200ml vegetable oil, 60g of butter, 3 eggs, 1 tablespoon vanilla extract, 2 medium courgettes coarsely grated, 1 large handful raisins, half a bar of milk chocolate, handful of chocolate chips.
Prior to cooking sprinkle a teaspoon of salt into the courgette, place in a sieve over a bowl with a piece of kitchen towel and a plate on top to weigh it down. The excess juice from the courgette will be removed.
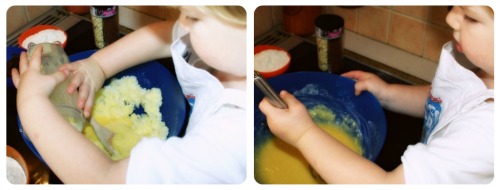
1. Cream the butter and sugar together.
2. Add the egg with a little flour to prevent curdling.
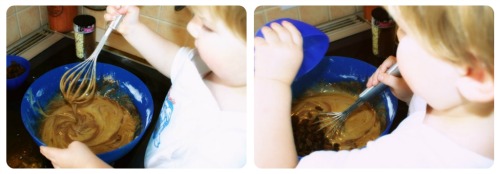
3. Add the remainder of the flour and whisk.
4. Add the oil and vanilla essence and mix together thoroughly, the mixture will be runny.
5. Stir in the remainder of the dry ingredients and the raisins.
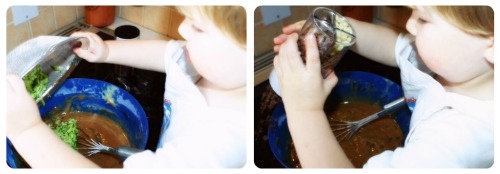
6. Gently fold in the courgettes and chocolate chips, along with the melted chocolate.
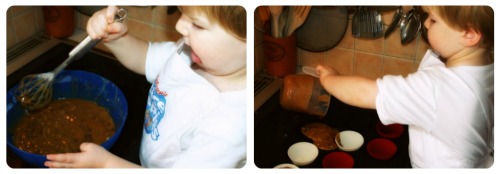
7. Mix thoroughly and then divide between cake cases. This recipe made 20 individual cakes.
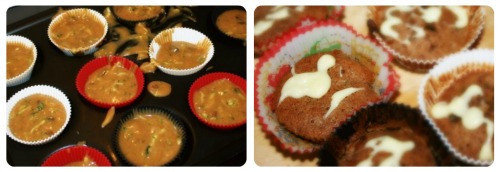
8. Place the cakes in a preheated oven at 150°C for 30 minutes until a skewer comes out clean.
9. We drizzled white chocolate on ours to add some colour.
These cakes are moist and really tasty. The Boy and Me (ha!) made them before Chef Brother came over to see us, and I was nervous about giving him one. He said they were really tasty and would be perfect for Christmas time, he then ate two! Wahoo, thumbs up if ever there was one.
The irony is that The Boy doesn't like them!
Sunday 25th September 2011 – 'Close-Up' (267/365)
- «Previous Page
- 1
- …
- 199
- 200
- 201
- 202
- 203
- …
- 266
- Next Page»


