How To Make A Hidden Treasure Book

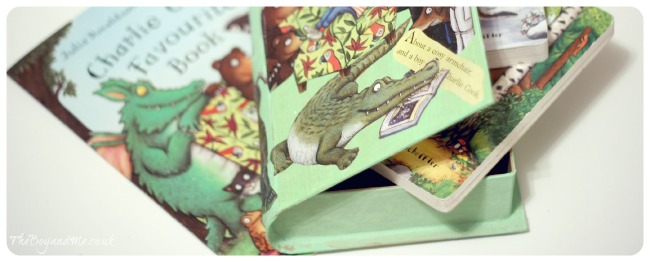
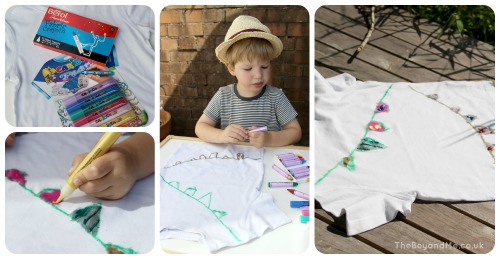
World Book Day may have fallen earlier this month, but when you have a four year old child who devours reading books at the rate of knots then every day is a book day! Seeing my son settle himself down to read a book independently is one of the most amazing things I've seen as a mum, and it is reassuring to know that he already has a love of books.

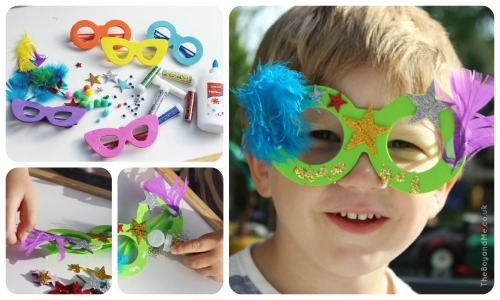
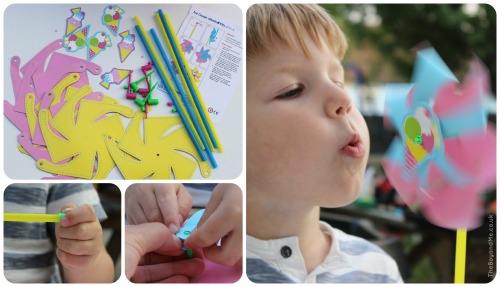
Every child has at least one favourite story, and this easy craft activity can be used to help explore the book and bring the story to life.

How To Make A Hidden Treasure Book 1

[Read more…]

5 Easy After School Play Activities

Ever since The Boy started school, I've missed many parts of our daily routine especially the spontaneous play sessions. Once home from school, he tends to collapse on the sofa with a snack and drink, watching television for a little while, and I realised quite quickly that it would be very easy for it to suddenly be tea time and not have had any time together doing anything.

As a result I have started setting up a play invitation for him to explore, nothing challenging or requiring any detailed levels of concentration, more activities that allow sensory exploration. I think he finds them quite therapeutic, exploring different textures, drawing patterns and allowing his mind to wander as he plays.

5 Easy After School Play Activities

Play Activities

  1. Tiddlywinks: I used transparent counters, painted some wooden numbers and place them in different sections. Each tiddlywink that lands in that section scores that point. The Boy loved working out his score after we'd played, and yes he beat me.
  2. Decorate The Line: I drew a wavy line on a piece of A4 paper and provided a choice of different coloured sands, beads and sequins to decorate the line as he saw fit.
  3. Pom-Pom Pick-Up: Pom-poms of different sizes amd colours, and large tweezers. This gives the potential for the child to sort them (if they want to) into colours or sizes.
  4. Coffee and Cinnamon Sensory Play: Based on this sensory play activity, I let The Boy explore the different scents from the coffee, cinnamon and dried oranges.
  5. Curious Conkers: It's Autumn and that means conker season. Would work well at any time of the year with flowers, seeds etc.

All of these items are resources that we had lying around the house (or garden). The partitioned plate is one of three that I bought for The Boy's birthday party food last year from Asda. The large tweezers are from Amazon and the coloured counters for tiddlywinks from eBay.

Mirror-Based Sensory Play

I take no credit for this play activity whatsoever! I was reading a wonderful learning through play post from Happy Hooligans last week which used a mirror as the play surface for sensory play. A wonderful play idea, Jackie suggests taking the mirror outside to show the reflections in the sky. Today it was pouring down, so funnily enough I wasn't too keen to do that, and set up inside by the window instead.

Sensory Play On A Mirror

I had a plastic tray that I've used for parties before, and I decided to fill it with natural and scented items all in an Autumnal tone; ground coffee, whole coffee beans, pebbles, shells, dried orange slices, conkers and cinnamon sticks. I also provided large tweezers, spoons, a funnel and cotton wool buds. I set the mirror onto the play table that we use to give The Boy a steady and secure base, and located it in a window for ample natural lighting.

"Can you smell it in the house, mummy? It's filling the house!"

Straight away The Boy went for the cinnamon sticks, intrigued as to what they were. He sniffed them, scratched them, rubbed them together and commented on how doing that released the smell.  He was utterly bemused to learn it was the same thing as we had used in cakes the previous week, and decided to pick up some ground coffee with it and compare the scent.

Mirror-based sensory play

He then became intrigued with mixing and pouring the coffee beans together with the ground coffee. The Boy started using the funnel to pour the ground coffee into the beans but then tried the beans into the coffee instead, he soon realised that they were too big to fit through the hole. The tweezers proved a bit of a challenge for him when trying to pick up coffee beans, turns out rounded objects are a bit tricky! In the end he used his fingers, and then a cockle shell to scoop up the ground coffee, and a cinnamon stick to mix the beans and grounds together. He loved pouring it into the whelk shell, watching it roll around through the spiral and then pour out the bottom.

Fine Motor Skills

"You make a maze, Mummy. And don't forget the dead ends!"

Pouring the coffee grounds onto the mirror, he chose a cotton bud to trace patterns in and then practised some letter formation. That soon seemed a bit too much like school so he then asked me to draw a maze in the coffee, with the all important dead ends. This is a great way to practise pre-writing skills and the pencil grip. The Boy also noticed that if he looked through some of the coffee into the mirror it looked like he was a different colour.

Pencil grip

"It sounds like music, like clapping. And listen, this is fast like raindrops."

The cinnamon sticks proved a huge hit, in more ways than one! The Boy really liked the sound they made when banged together, and then he decided to pour the ground coffee and the beans to see which made the loudest noise. Of course the best thing that made a sound was the magical seashell that he could hear the sea through!

Mirror-based Sensory Play

"I want to make a tower like they did on Tree Fu Tom!"

I asked The Boy if he could make a pattern with the shells, I thought he might have made a flower or have sorted them. Instead he laid them out in a row, one up and the next down, repeatedly. Then he asked what he could use the pebbles for, which I turned around on him, and he suggested making a tower and seeing how high it could reach. He very quickly remembered about choosing flat stones to rest on top of each other, and persevered until he managed five high!

Building a pebble tower

I was amazed at how well this activity went with The Boy, especially as I've never given him much sensory play in the past as he doesn't like gloop or mucky hands. This has shown that he can explore the senses without becoming mucky, and that actually he got a lot out of it. I gave it to him when he'd been in from school for about half an hour and, as my husband pointed out, he seemed to find it very therapeutic as it didn't need a huge amount of concentration and he could explore at his own pace and in his own way.

 Mirror-Based Sensory Play

Easy Summer Craft Kits From Yellow Moon (Review)

We've recently been sent some products from Yellow Moon, the arts and crafts suppliers, to try out over the Summer holidays. With a week still left of the holidays, there's still plenty of time to get crafty with your children using these simple Summer craft kits; they range from ten minutes to hour long activities which are easy time-fillers and don't cost the Earth.

Carnival Glasses

Carnival Glasses

In the foam glasses kit there are six different coloured foam glasses, it doesn't come with decorations supplied so it does mean having to find sequins, feathers, etc to decorate them with. However, this then means for greater personalisation depending upon the occasion. We decided to make carnival glasses, but they could easily be used for a clown party, etc. The best part about these glasses is that the arms fold out on a hinge, rather than bend like some cheaper plastic glasses. It means they stay on a lot more easily when worn!

At £3.60 for six glasses, these would be perfect as an activity at a birthday party, creating an instead party favour!

Ice-Cream Windmills

Paper windmills

This paper windmill kit comes with six windmill templates in two colours, six plastic sticks in two colours, six ice-cream fasteners in two designs, and six plastic stoppers or hinges. It's relatively easy to make and take approximately five-ten minutes to construct one, depending upon how much assistance is given. The Boy needed a little help to stop the windmill sections from pinging off the central spoke once attached, and to accentuate the curve a little more to allow the windmill to spin.

A well-priced kit at £2.99 with everything included to make six attractive ice-cream windmills.

Bunting T-Shirt

Bunting t-shirt

Using the Berol fabric crayons and the 3D fabric paints, we decided to create some bunting for the front of one of The Boy's old t-shirts. The crayons were a little tricky to use over the fabric and so I had to hold the fabric tight for The Boy but they were very easy to colour with, not stiff and gave a deep vibrant colour. The fabric paint pens were easy to control and dried leaving a three-dimensional appearance.

Berol fabric crayons are £3.99 and contain 12 colours, the Carioca Art 3D fabric paints cost £3.99 for six.

I was sent the above products to review as part of the Yellow Moon Craft Bloggers Network. My opinion is honest and unbiased.

How To Make A Stick Picture Frame

On a recent trip to one of Britain's finest arboretums, I took our trusty craft bag with us for when I would be presented with the obligatory sticks. The place was full of wonderful vistas and so I suggested to The Boy that he collect me four sticks of equal length and a variety of interesting treasure to decorate our finished product.

How To Make A Picture Frame

You'll need:

  • 4 sticks of equal length, or 2 pairs of sticks of equal length
  • natural string
  • collection of leaves, conkers and pine cones to decorate the frame
  • Swiss army knife

Encourage children to only choose twigs and natural 'treasures' found on the floor, creating a respect for the natural world.

  1. Lay the four sticks for the frame on top of each other to create a square. Carefully wind a length of string around each of the joins, overlapping and winding from one corner to the other. This will hold them in place.
  2. Complete for each corner, winding any extra string along the sides which will help create somewhere to secure the 'treasures'.
  3. Tie a selection of pine cones to the frame and thread leaves and flowers through the string.
  4. To attach conkers, I pierced a hole through the fruit to thread jewellery wire through and wind it onto the frame.
  5. Tie some string from two corners to create a loop to hang it from a tree in your garden at home!

How To Make A Stick Picture Frame

  • This activity is great for:
    • fine motor skills and hand-eye co-ordination; winding the string around the sticks.
    • design skills; how can we join the sticks together? Can we find items to make it look attractive?
    • communication; questioning and discussion.
    • self-esteem; achievement!
    • having FUN!

'Create some wild art' is #18 on the National Trust's list of 50 Things To Do Before You're 11&¾


Seashore Sensory Table (Learning Through Play)

A few weeks ago we went to Oxwich Bay with my brother and his family for a day on the beach. It was a brilliant afternoon, and one that will definitely go up there as a highlight of the Summer due to the relaxed free-range play that The Boy and his cousin enjoyed, while my brother searched my cockles on the water's edge. However, for me the best part was exploring the rockpools with my sister-in-law who works in outdoor adventure activities and has received training in 'Beach Schools'.

The lesser known 'Beach Schools' don't seem to have the recognition or accreditation that 'Forest Schools' do in the UK, which is a particular shame as the entire country is surrounded by the most wonderful coastline. My sister-in-law was eager to pass on her training to us and show The Boy all about the wonderful creatures which live in rockpools. He was fascinated, as was I, and so I decided to take our learning home with us.

I half filled a bucket of water, collected a variety of shells and seaweed specimens and set them up in our trusty Step2 water table which has two tiers. Into the bottom I placed sand and the shells, the top level had seawater and the seaweed.

Then I invited The Boy to play, and learn.

Seashore sensory table

The cockle shells completely fascinated him! He compared them to castanets and tried to play music with them. He noticed that one hadn't opened properly and examined the creature inside (brought home in error!). Then he made imprints in the sand with the cockle shells and noticed the ridges, and how they joined together perfectly.

Next I presented The Boy with a shell identification sheet and he started trying to match up the shells to the animals which have them as homes.

Seashore sensory table

The sheets which my SiL gave me are aimed at older children (who can read), however the illustrations are so clear that it's easy for younger children to use them with an adult to read to them. The Boy was fascinated with the identification sheets, and quickly noticed the one for seaweed trying to work out which seaweed was bladder wrack etc.

Seashore sensory table

This was an excellent learning experience for him, and one which will be easy to repeat in situ next time (as we've laminated the guides) we go to a beach. We happened across one last week while on holiday, and he was fascinated with the limpets and muscle shells we saw covering the rocks.

Seashore Sensory Table

Identification Sheets:

Related Posts Plugin for WordPress, Blogger...