Rainbow Weaving (Scrap Art)

A fortnight ago, I read this post about scrap centres from The Alexander Residence. It reminded me about the recycling centre that I used to visit when I was training to be a nursery nurse, and I wondered if sixteen years later, it was still going. It is, and it's been improved. I had a little think about what activity we could do using the resources that we'd be able to find there.

Then the next day, a post from the Goddess that is Cathy at The Nurture Store popped into my inbox about the new Kids Art Explorers' Challenge. The theme was paper-free art, and suddenly I knew exactly what I was going to be doing with The Boy.

His favourite song at the moment is the 'Mo-mo' song from 'Show Me, Show Me'. We both pretend to be robots, put on our best mechanical voice and do robot arms while singing about the colours of the rainbow. It's quite amusing and I'm trying to get it on video to post, but he runs away screaming whenever I produce the FlipCam lately.

When we finally managed to get to our local scrap centre we had great fun delving in all the bins, finding treasures, discussing what we could use them for, getting over excited with various materials that we had no use for (let alone space) and saving oodles and oodles of dosh.

Originally I'd intended to do this activity on the patio using the bamboo fence. But it's currently submerged in eleventy billion feet of water so I tied netting up against the bannister upstairs on the landing and we did the activity there instead.
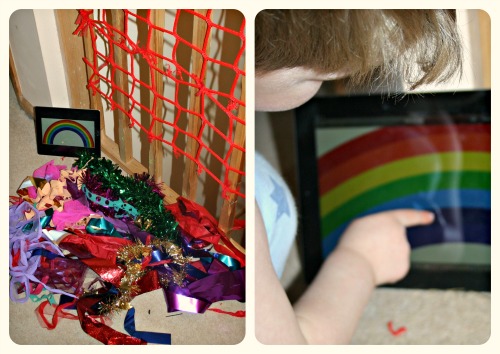
I knew the iPad was an essential educational tool! We gathered our resources together, examined a reference picture and discussed which colours we needed. An interesting discussion about what colour indigo is ensued and then a discussion about the difference between that and violet. Try and explain hues to a two year old.

Life became a lot easier for both The Boy and me once I'd remembered he is left-handed and realised that threading from left-right was causing him issues. One of the many things that need reversing when teaching a left-hander.
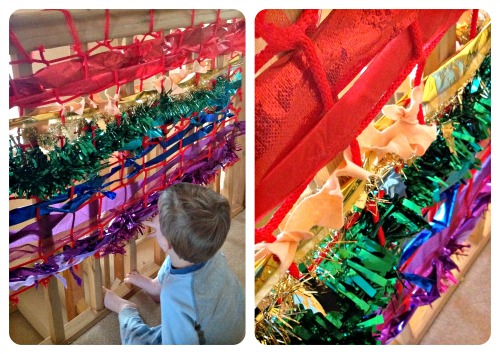
Admiring our handiwork and our beautiful rainbow!

This was a really enjoyable activity and The Boy loves sitting and feeling the different textures in the rainbow along with singing Mo-mo's song. The total cost of the resources for the activity was £1. (Just ignore the cost of the iPad)

You can search for your own nearest scrap centre here.

I'm linking this up to The Nurture Store's Kids Art Explorers Project.
Crafty Corner: Easter Cards

Last week I went into school on the Wednesday intending to teach my Wednesday morning Year One class R.E. and ended up making Easter cards with them; a change that I was all too happy to make. I'm much happier helping the five and six year olds make cards for their mummies and daddies than waffling on about the role of authority figures.

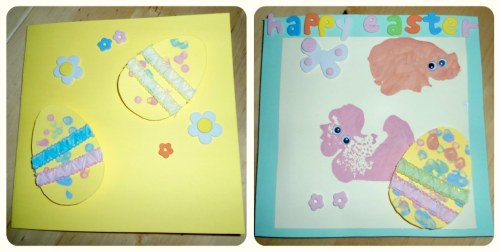
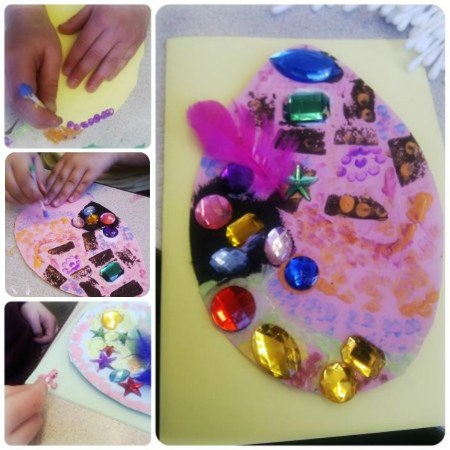
This is what we ended up making together, all I did for them was the springs which the eggs were mounted on.

I loved the simplicity of the cards and how much of it was done by the children, so I decided to adapt the idea to make Easter cards with The Boy.

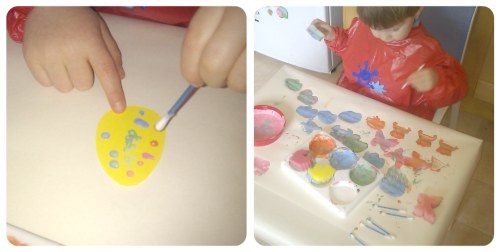
I cut out some small egg shapes, grabbed a handful of cotton buds, some paint and sponges, coloured sticky strips and off we went.

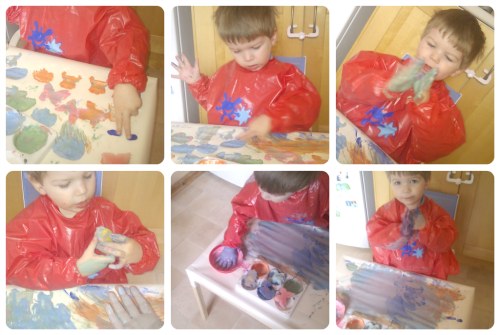
The Boy coped really well with using the cotton buds to dot the paint on and absolutely loved the sponges (chicken and sheep) to dab the paint on. In fact he got carried away and sponge printed all over the table.

And that's when it descended into chaos. You see The Boy doesn't like getting messy and I decided to use a little sensory play and painting without brushes (inspired by The Nurture Store) to try and cure him of it.

Look at that face in the last picture, butter wouldn't melt!

Oh and the cards?

They turned out ok didn't they?

I'm linking this up to the fabulous Kids Art Explorers on The Nurture Store, pop over and check out the other link-ups.


Sciencesparks3

Learning Through Play: Colours

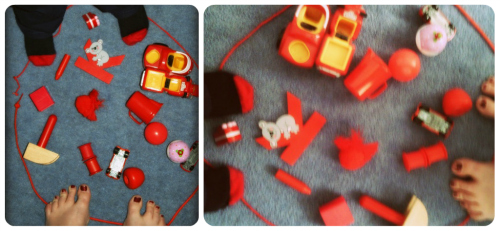
Last Friday the theme on #MarchPhotoADay on Instagram was 'red'. I debated his red jumper, a red flower in the garden, blah, blah, blah. All very boring. Then it struck me when I was tidying up the threading and beading we'd been doing. I picked up the red lace and the red cotton reel and had a moment of inspiration.

I took the lace into the living room where The Boy was playing, put it down in a circle and asked him if he could find me anything red. He looked around the room and found one or two things, but needed a little help to see anything that wasn't shouting out to him. Then given a little more prompting he found a plethora of things, including my toes and his! I lined up the iPod ready to take a snap and he stopped me as he wanted his VTech to take one too.

Hopefully, it's obvious which one is whose!
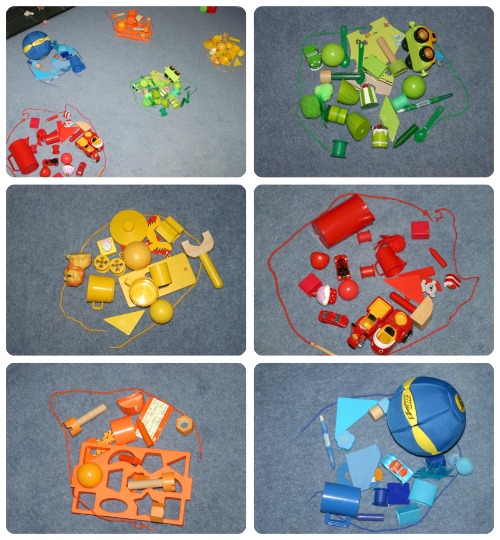
He then ran off to find another coloured lace and we spent the next thirty minutes sorting things into colours.

He had loads of fun and I can't recommend it highly enough as an activity. It's excellent for pre-mathematical development; identifying colours and sorting accordingly so.

Have fun!

Chick In A Basket (Guest Post)

The Boy and I (see I can be grammatically correct when needed!) love craft activities, and I am always on the look-out for new ideas. I was recently browsing the Internet looking for some coloured sand when I came across the Baker Ross site. I already knew about it through my teacher alter-ego but hadn't thought to look there before. I was pleasantly surprised to find a whole load of craft activities for Winter and Spring, and bought a whole load of craft materials that we're currently working our way through.

In this guest post from James Christie (who writes for Baker Ross), you'll find simple instructions on how to make a very cute Easter chick.

How children can craft a chick-in-a-basket

Easter isn’t far away but there is still time for kids to make some super Easter crafts. The cheerful Easter character baskets that this article will explain how to create, are fantastic gifts and look great when displayed at home or in the classroom.

Put the items mentioned below in your Easter shopping basket and you will be ready to begin.

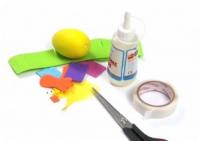
  • 3D Easter Character Foam Kits – a pack of 4 currently (as of 8th March 2012) costs £3.80
  • Super Strong Multi-Purpose Silicone Glue – £3.98 for a pack of two and £10.50 for a pack of six
  • Mini Glue Dots – £2.99 for a box of 300

All these items are available from kids arts and crafts company Baker Ross and don’t forget to have a pair of children’s spring-loaded scissors to hand. This piece of equipment will make sure that kids can happily cut away with ease – you can get a pair for under a pound.

There are two designs in the kit and this article will concentrate on hatching a plan to make the chick-in-a-basket. Reading out the following instructions to your children might help them with this task.

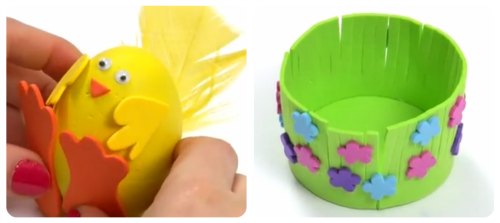
Firstly, take the green-fringed strip of foam and the green circle and apply silicone glue around the rim of the circle. Press the fringing around it to create the basket (as below).


You will need to trim off any excess foam so that your basket has a neat perimeter.

While your basket’s glue is drying you can pick up the yellow egg shape and glue your chick’s orange webbed feet to the base.

Once the feet are in place, give the chick wings by gluing some on top.

Your chick is now ready to fly but how will it see? It’s time to stick the adhesive wiggle eyes near the dome of the yellow egg. I love the way the eyeballs wobble whenever the chick is moved!

After a little triangular orange beak is added, the chick is only missing one vital component – its feathers. So, take a big yellow feather and put it on the chick’s spine – it’s really ready to shake a tail feather now!

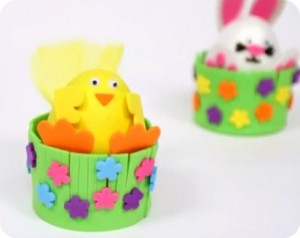
You might think the task is finished now and it almost is. It’s time to return your attention to the green basket; hopefully it’s dried by now. Inside your kit you will find three sheets of foam flowers with different colours on them. Pop these out of their sheets, peel off the back and adorn your basket with them. Don’t forget to press down firmly so they don’t fall off.

Lower your chick into its comfy basket home and stand back to admire this excellent Easter piece of art. The chick might well look a little lonely sitting in its basket on its own so why not make a bunny-in-a-basket to go with it?

Have a great Easter!

You can find all the Easter Craft Essentials your kids need at the Baker Ross site.

Here's an easy video tutorial of the process

This is a guest-post

Learning Through Play: Changing Shape

Before I became a primary school teacher, I trained as a nursery nurse and studied the importance of play as a part of a child's development. Learning through play is a subject close to my heart, and it's what the Foundation Phase (nursery and reception) teaching is all about nowadays. In my school, we embrace it up to the end of infants. I'm used to it, I love it, I provide The Boy with loads of opportunities for it, and yet I always forget to blog about it.

Which is daft.

However, last week on one of my favourite sites ever, I came across this little gem and immediately purchased the necessary equipment to make it happen. And then I sat and pondered exactly what to do with these tiny little beads that were not much bigger than hundreds and thousands. Luckily Cathy at The Nurture Store is a kindly soul who was more than happy to bounce ideas back and for' with me.

Changing Shape with Water Beads

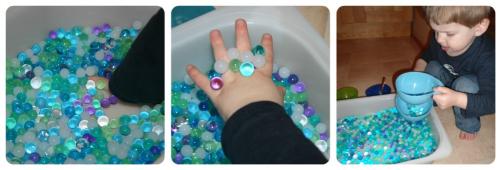
Water beads are strange little entities. Incredibly popular with florists for vase displays, they start out life as very small pellets. 'Soak each 5 gram portion in 1 litre of water and within 24 hours they will have absorbed the water and swollen in size.' In reality, they were full size within 10 hours and we only needed half the water.

We had great fun swirling and squidging them, watching them expand and change shape.

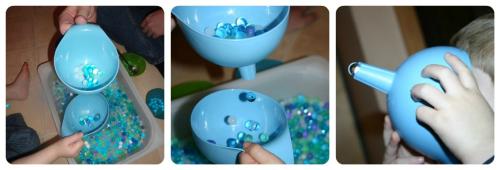
The next day we came back to them when they'd fully absorbed the water. I drained off the excess water and gave the tray full to The Boy to play with, along with some coloured bowls, spoons of different sizes and funnels. I left him to it for a little while, sitting back and noting what he was doing, only contributing when asked something. I wanted to see what he did, his thoughts and observations.

He realised straight away that they'd absorbed the water, and he loved the change in texture and size. He poured, stirred, squidged, bounced (rubbery now!) and had great fun pouring and playing. (Scientific development: changing shape)

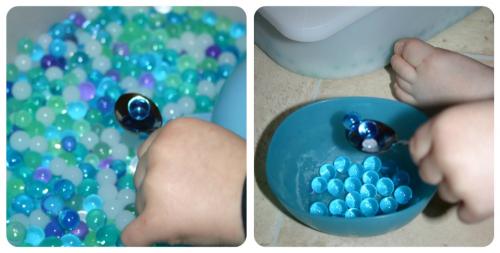
After a while he asked what the bowls were for. I asked him what colours they were and if he noticed anything that was the same. He pointed out the colours of the beads, and started to try and pick them up with his fingers to put into the bowls. Thing is about these water beads? They're slippery little blighters and they kept popping out of his fingers. I asked if there was anything that he could use to help him get them out, and he chose to use the spoons. (This helps mathematical development: sorting into colours is a pre-maths skill. Also develops fine motor skills: hand-eye co-ordination and control)

The funnels were the best part of the exploring session. £1 for 2 from Ikea and he loved pouring them in and seeing them cascade out the bottom. One clear bead got stuck and he and Mr. TheBoyandMe decided to use it as a looking glass. They noticed fairly quickly that the image was upside down. Cute alert: The Boy tried to turn it around to make it go the right way up! (Scientific development: physical processes)

Water beads = great fun!

Our next step is to take a bowl of these, lay them out on a tray lined with kitchen towel and put them in the airing cupboard. We're going to try and get them to shrink back to their original size!

I'm linking this up to Science Sparks

Sciencesparks3

Mister Maker Comes To Town!

The Boy has always loved doing craft, and rightly so. I'm a crafty sew and sew, and love making things, so it's only natural that he should. It's good for him as he develops his hand-eye co-ordination and fine motor skills through crafting, there's sensory development in there, pre-writing skills, pre-maths skills, as well as being plain, old-fashioned fun!

The only problem is that, like many households all over the land, I am ending up with small bags and tubs of craft equipment littering the house. The piano top has a pile of paintings etc. alongside cellophane bags of googly eyes and pompoms. I need it to be more organised!

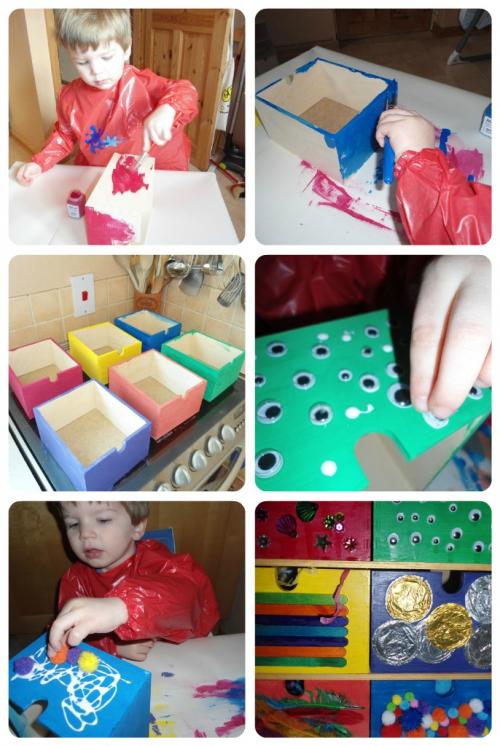
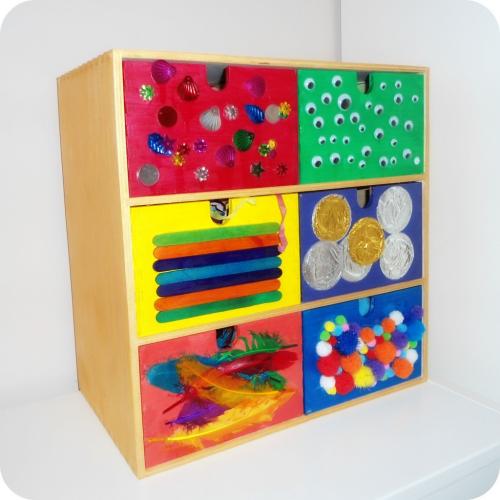
Which is when I remembered what one of the mums in my toddler group said about a year ago at a coffee session. She'd made some Mister Maker drawers. So, thanks to Crafty-Hands-On Mum, we popped to Ikea this weekend and invested in some small wooden drawers, paint and varnish. Incidentally, their children's paint is excellent because it's the only one I've come across that doesn't stain our hands, including the red or blue!

Here's our Mister Maker drawers in a simple photo story:

And here are our Mister Maker drawers, all small bits and pieces neatly organised in a fun, cheap and crafty way!

What do you think?

Hallowe'en Party Ideas

It all started when I was sent a fantastic box of Hallowe'en goodies* to review. Then, when I became involved with planning my toddler group's Hallowe'en party, the cogs in my little ol' head started whirring. I'm just starting out on the whole party extravaganza, but I love party-planning. For me, it's the whole experience; party games, tableware, food, costumes, decorations, party bags etc.

Therefore, I've decided to put together some ideas for a toddler's Hallowe'en party, of the non-scary variety.

Party-games

  • Dangling Doughnuts: suspend doughnuts on strings (enough for one child) from a washing line. Without using their hands, the children must try and eat the doughnuts. This is a much safer alternative for pre-schoolers to bobbing apples.
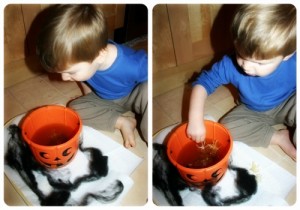
  • Messy-play: this is the ultimate excuse for goo and ickiness galore! Delve into green rice-pudding, beans, pickled onions (eyeballs anyone), custard and jelly. For added fun, hide small (wrapped) treats or gifts in the cauldron which the children must find.
  • Trick or treat: have two tubs, one filled with dry-ish small food types (like rice) and one filled with slime (beans, custard, pumpkin innards). Bury the treats at the bottom of the pot and the children have to choose a trick or treat bowl to find their goodies. I'm using this one for trick or treat-ers on Hallowe'en night.
  • Digging for bugs: Fill a large 2litre capacity tub with green slime (jelly). As the jelly cools, drop in plastic bugs and spiders, make sure you do this in layers. Once cool and set, provide the children with a tea-spoon to dig out the insects.


Decorations

When we have our toddler group's Hallowe'en party, we're going to be hiring a church hall (eek! Hope the big man doesn't mind?) and will need to decorate it quickly, but effectively. That's where the black spiderwebs will come in; we'll use them to decorate the walls. Combined with orange and black balloons which we will be sticking up, it shouldn't take too long to decorate but look effective.

Treasure Box

I posted here about how I am a fan of The Imagination Tree, and the freedom in play that Anna gives her children which allows them to explore their world and environment. Exploration is the key to learning, providing them this opportunity in a focused and safe way is so important.

When I saw this post from her the other day, 'Flowers and Fairies Sensory Tub', I was immediately interested and thought how I could adapt it for use with a boy.

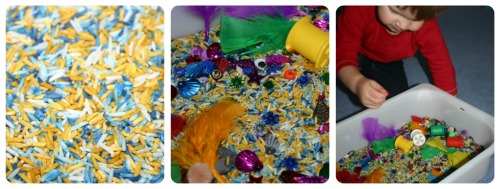
Basically dye some dried rice using food colouring, allow it to dry for a day, pour it into a shallow and wide tub, and then add some extra items in for variety of texture, size and colour.

I dyed two lots of rice; one blue and one yellow. However, I am an impatient Annie and didn't have the inclination to wait a whole day for it to dry. So I put it in the oven on a very low heat for two hours. Anna and I had a discussion over twitter as to whether this would work, she was pleased to hear that it did. I then added a handful of primary coloured sequins, feathers, beads, some old house keys, and last but not least, googly eyes!

We had great fun with this treasure box. He was very reluctant at first to get his hands in amongst the rice, but once I'd got him convinced that it wasn't going to hurt him, he was captivated. We got a couple of pots out and he started to use these for sorting the sequins into, and then pouring the rice from one pot to another.

I had bought a tub from Ikea for this, and made sure I got one with a lid, which has meant that we've been able to store it on top of the cupboard and come back to it. When I need a little more space, this will pour into a screw-top jar and can be used again. Not sure how long it will last but I'm giving it a go.


Anna has identified these learning links from this activity:

Learning Links:

  • sensory: exploring a range of textures and materials with hands (and feet!)
  • fine motor: scooping, pouring, pincer grip to pick up individual pieces of rice, mixing
  • creative: make up stories and role play scenarios using toys and imagination
  • literacy: develop language, vocabulary and storytelling skills
  • maths: count out scoops/petals/rice/sequins, explore capacity through filling and emptying
  • PSHE: work collaboratively and share resources

First House

A few months ago I discovered the wonders of RedTedArt and The Imagination Tree. Both are blogs that I admire hugely because they promote the marvels and benefits of Learning Through Play and the importance of Art in a child's life.

Before I was a primary school teacher, I trained as a Nursery Nurse and was intent upon becoming a Nursery teacher. And then I had a teaching practise in Year Five and I've never looked back, turning away from the littlies proclaiming them "too small and easy to accidentally step on!" in a jovial and, quite possibly, dismissive manner. However since having The Boy, I've rediscovered the joy of craft and role-playing with the 'littlies'. To the point where I asked my boss (in my annual review) if I could work with them again. She almost fell off her chair in shock, but at that time was unable to grant my wish.

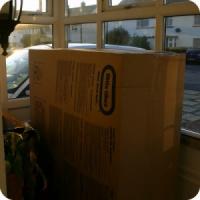
So I channel my ideas at the moment into the most important 'littlie' of them all, The Boy. Last week, we took delivery of a Little Tikes house to review as a part of the Toyologist programme. The box was massive (well it had to hold a house!):

What do you do with a box that big?

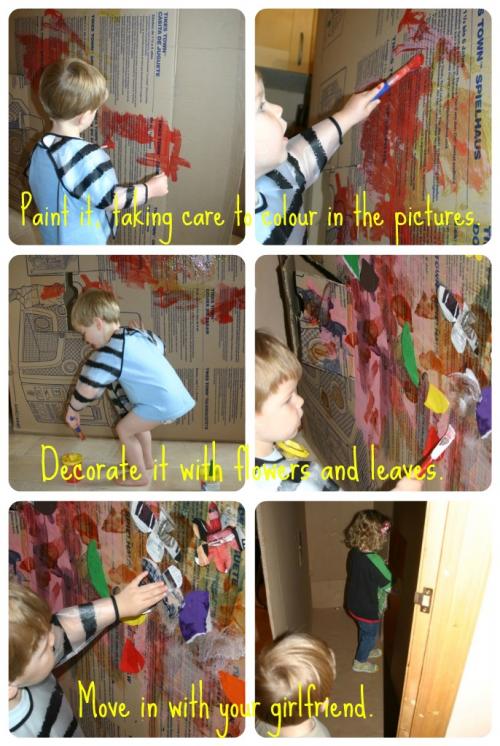
Turn it into a play-house for The Boy to decorate!

The box was huge, big enough for daddy, The Boy and Me (see what I did there?) to get in easily. I cut a door on one side and windows with shutters on the other side, and he absolutely adored it. Daddy? Not so much, it kept getting in the way of the recycling which he needed to empty, or the toilet, or anything really. Admittedly for a time, The Boy was the only one who could get through to the utility room (through the open end and out of his door) so once or twice I had to send him on a little job!

The Boy has had great fun this week; painting, decorating, hiding and playing house in his, um, house. Which is great because it's rained a fair amount so he hasn't managed to get out to the main toy; the Little Tikes house. He's played in it with his friends and cousins, and I have discovered that there is nothing more likely to make children giggle than crawling through a cardboard box.

Well I managed to hold onto it for a week, but it's cardboard recycling on Friday and I've got a toddler group coffee session tomorrow, so we've had to move the house. I'm hoping that The Boy doesn't ask where it is in the morning!

Click this widget to see the marvellous Imagination Tree

And this one will take you to the fabulous RedTedArt


Luminarium: A Wonderous Kaleidoscope

When I broke up for Summer last Friday, I vowed that The Boy and I would do a lot of fun things this summer and so far, I don't think I've done too badly. Last weekend we went to Cadbury's World and West Midlands Safari Park (where we had a little tweet-up), earlier in the week we met up with friends and had a fantastic picnic in a beautiful park in Cardiff, we had friends over and have visited others. Today, we were lucky enough to be invited to attend the Luminarium at Taurus Crafts, Lydney.

Taurus Crafts, in the Forest of Dean is not only a craft centre, but also a social enterprise. Elizabeth, the lovely manager, explained to us that this meant they worked along local businesses and artisans to provide products and crafts that were locally sourced. In addition to this, Taurus also work with local care agencies and schools to provide real-life and relevant work experience developing life-skills for people with learning difficulties whose needs are not well met through mainstream education and training. To support this brilliant and worthwhile enterprise, there are 15 craft businesses, a cafe, gift shop and local food shop and deli, which all supply amazing products and unique crafts that are out of the ordinary.

The Boy and me (ha, see what I did there?) arrived a little after the agreed meeting time of 11am (sorry Mummy Mishaps and Would Like to be a Yummy Mummy). Mainly because when I sat down in my car and programmed in the GPS I had a little fit that a journey that was only 40 miles was going to take an hour and a half. It was 10.20! That combined with the oh-so-convenient fire in the Brynglas tunnel in Newport meant that I was late. No surprise there, I'm always 10 (or so) minutes late. I think of time, like Dr. Who (DT not MS) says, as more of a wiggly-wavy thing meant to be bent.

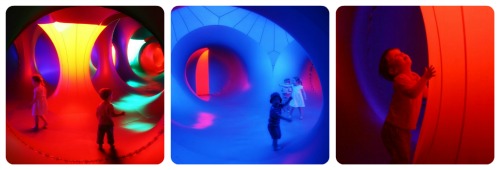
And so to the Luminarium. What is it?

The best explanation that I have seen so far of a Luminarium is in this video, where it is explained that the original creator started designing them over twenty years ago and came up with the idea of "inverting a bouncy castle." See! I wasn't so far off the mark when I said about being inside a bouncy castle! Incidentally, I spoke to a member of Architects of Air afterwards who told me that the first one was designed as a stage for a play performed by children with special educational needs. That is completely understandable because the whole experience is visual, auditory and kinaesthetic.

With something this difficult to explain, you just need to be in it. And if you can't be in it, then here's a video to show you what it's like.

We received free entry into the Luminarium. I was not asked to blog about this but have chosen to, because I think it's a fabulous thing to experience.

Related Posts Plugin for WordPress, Blogger...