Home-Made Christmas Tree Decorations

Every year since The Boy was born, we buy him his own special Christmas decoration (to help build up a collection for first adult Christmas tree) and write the year on the bottom of it. I always aim to buy traditional style decorations that have a story to them and he's fascinated by them. This year he's old enough to start making his own decorations and I can't wait to see our Christmas tree filled with his home-made decorations in the future.

You'll need:

  • green felt
  • red felt
  • green or red ribbon
  • green, white and red buttons
  • felt holly leaves and berries (I bought these from Baker Ross)
  • PVA glue
  • scissors

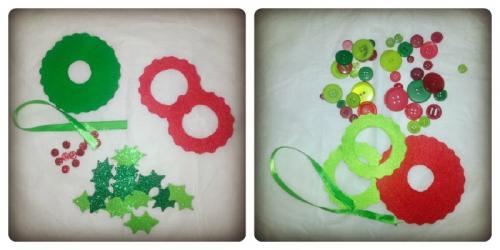
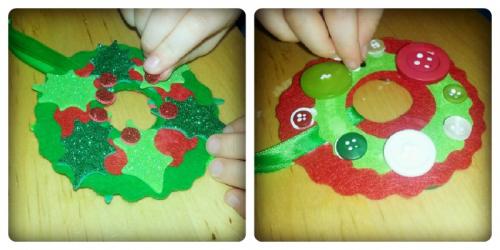
felt decorations

  1. Draw two large circles (one red and one green) and then draw a small inner circle in the middle (I used a large coffee mug rim to draw around).
  2. Cut two smaller circles out of the green felt, and two from the red. These will also need an inner circle, but this must be bigger than the inner circle on the large red or green circle.

Holly wreath decoration:

  1. Cut a 20cm length of ribbon and feed it through the middle of the large green circle, glue it into place and tie the end.
  2. Glue the red circles into place over the ribbon on each side of the large green circle.
  3. Stick holly leaves and berries over the top of the red small circles on both sides and leave to dry.
felt decorations

Button wreath decoration:

  1. Cut a 20cm length of ribbon and feed it through the middle of the large red circle, glue it into place and tie the end.
  2. Glue the green circles into place over the ribbon on each side of the large red circle.
  3. Glue a selection of red, green and white buttons over the small green circles on both sides.
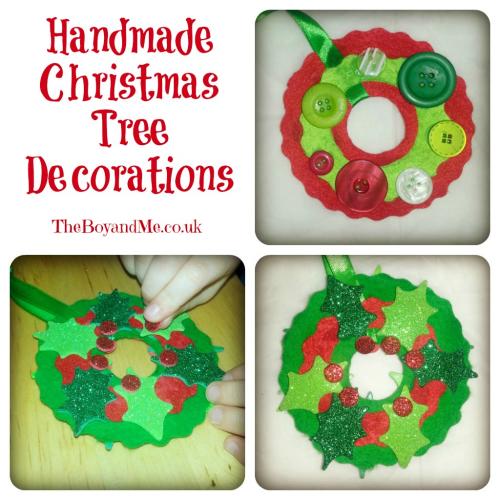
christmas decorations

'Counting Down To Christmas' is a craft bloggers link-up held each week in the eight weeks preceeding the big day itself. Each week we will be posting a different Christmas craft activity.

Rainy Day Mum ~ Mummy Mummy Mum! ~ Life at the Zoo ~ The Fairy and The Frog~ Jennifer’s Little World ~ Making Boys Men ~ Mama Pea Pod

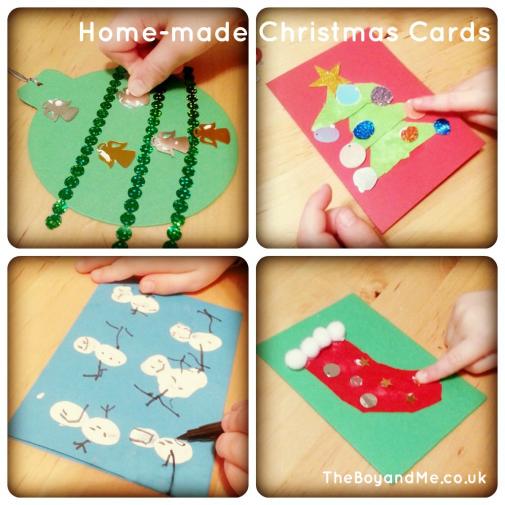
Home-Made Christmas Cards

Before The Boy was born I used to spend hours looking for the perfect Christmas cards which would complement my chosen wrapping paper and the theme of the year. Then along came a perfect little being who looked incredibly cute dressed up in a Christmas costume, and he would be duely photographed and the image printed onto the front of personalised Christmas cards. This year he's going to be three and a half at Christmas and I just can't do it to him anymore; so in addition to traditional Hallmark cards, he's going to be making cards for family this year.

Here are some very simple cards that your pre-schooler can make within a few minutes.

You'll need:

  • red and green card blanks
  • blue card blanks
  • white paint
  • green felt
  • sequins and stars
  • bauble card blanks
  • glue
  • ribbon
  • felt pens

I'm not going to do a ste-by-step guide because the photos really show how self-explanatory the cards are!

One tip: start making them now because pre-schoolers are not known for their ability to sit down for a few hours and make cards, then write them!

'Counting Down To Christmas' is a craft bloggers link-up held each week in the eight weeks preceeding the big day itself. Each week we will be posting a different Christmas craft activity.

This week the co-hosts are Rainy Day Mum ~ Mummy Mummy Mum! ~ Life at the Zoo ~ Here Come the Girls ~ The Fairy and The Frog ~ Jennifer's Little World ~ Playful Learners ~ Making Boys Men

 This post contains sponsored links. The content is original, honest and uncontrived!

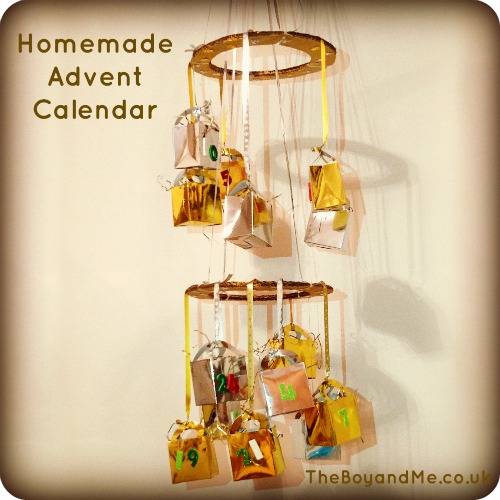
Home-Made Advent Calendar

I know it's only the 1st of November, but in about three weeks time you'll be grateful that I started these posts early.

Advent: (n) The coming or arrival, especially of something extremely important.

For Christians, Advent starts on the fourth Sunday before Christmas Day where a candle on an Advent wreath is lit for each week leading up to the celebration of the birth of Jesus.

For most families nowadays, the word 'advent' used around the festive season conjures up chocolate calendars printed with their youngster's favourite television character, some may have a gorgeous 'traditional-style' wooden tree with 24 drawers in, allowing it to be reused each year. And yes, I said '24' because 'advent' means the 'approach of'. It's a way of marking the coming of Christmas Day, and as such should not have a 25th window. This practise of counting down each day was started by German Lutherans at the beginning of the 19th century. Not such a new tradition hey?

We've been making our own simple Advent calendar to use in a few weeks time when December starts.

You'll need:

  • coloured foam or card numbers
  • 24 boxes*
  • coloured, shredded tissue paper
  • ribbon*
  • 24 'treats'
  • cardboard
  • glue
  • gold paint
  • sequins*
  • scissors
  • paintbrush

Christmas crafts

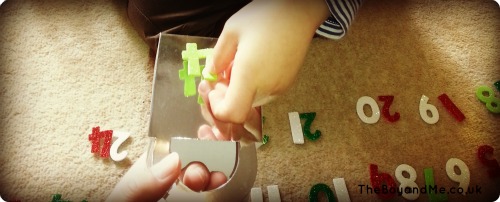
Set out the numbers into a numberline up to 24.

Christmas crafts

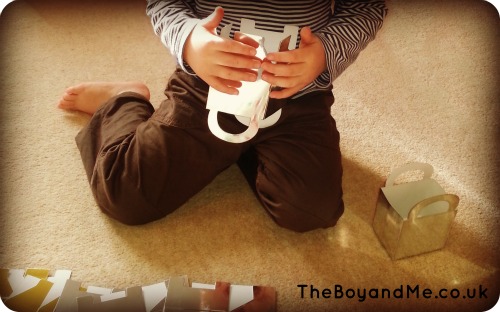
Assemble the boxes.

Christmas crafts

Stick on the numbers to the front of the box.

christmas crafts

Place the shredded tissue paper and a treat inside each bag. (I've used a mixture of Christmas tree decorations and chocolate coins). Tie the handles together with a length of ribbon, long enough to tie off the hanging circles (30cm).

christmas crafts

Draw four circles with an inner circle in them, creating a hoop shape. Cut them out and stick two together. Once dried, paint both sides with gold and stick gold and silver sequins on.

Tie four lengths of ribbon to the first hoop. Cut four double length strips of ribbon and tie them to the second hoop. Gather all of the eight ends together and tie into a knot. This forms the loop to hang the calendar from. From the first hoop, suspend twelve of the boxes and from the second tie the other twelve. If you arrange this in a random order then it makes it more of a challenge to find the numbers.

christmas crafts

'Counting Down To Christmas' is a craft bloggers link-up held each week in the eight weeks preceeding the big day itself. Each week we will be posting a different Christmas craft activity.

This week, the co-hosts are Rainy Day Mum ~ Mummy Mummy Mum! ~ Life at the Zoo ~ Here Come the Girls ~ The Fairy and The Frog ~ Jennifer's Little World ~ Playful Learners ~ Making Boys Men.

Pirate Craft Under A Yellow Moon Sky

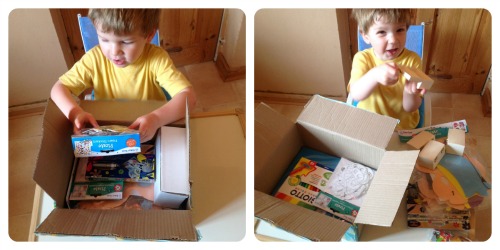
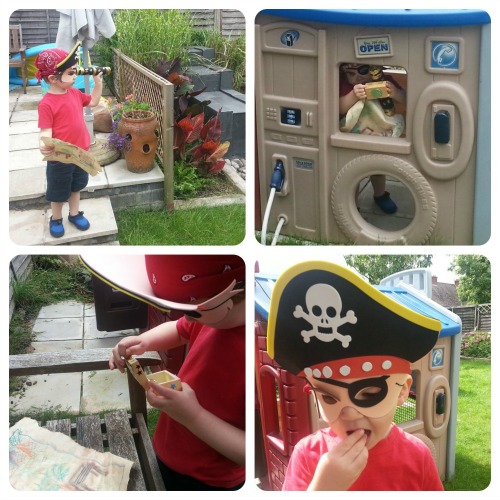
It's fairly obvious to anyone who reads this blog regularly that I like doing craft activities with The Boy. And obviously Yellow Moon got that impression as well because they've sent us a box of art and craft supplies to get busy with over the Summer holidays. We've been chocka-block embracing our inner pirates in a wealth of shiver-me-timbers activities and had great fun in the process.

pirate crafts

The Boy and I have made a number of things with these resources, and I have posted about them separately, but there were a few smaller activities that I wanted to share and show the resources we used to make them.

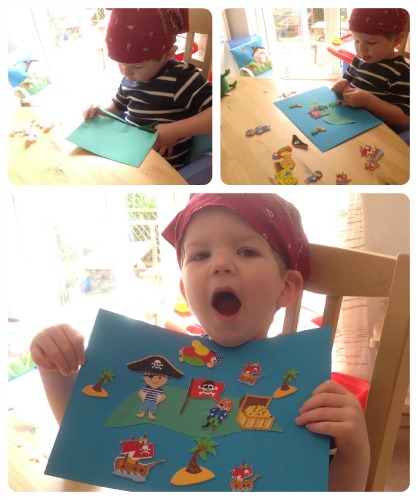
Pirate Collage

pirate craft

Foam stickers (£2.99 for 120) and coloured card (£2.99 for 50).

Pirate Finger Puppets

pirate craft

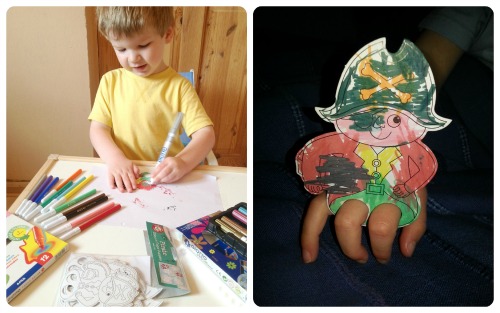
We coloured in these nifty pre-cut finger puppets (£2.99 for 24) with metallic pens and coloured felt pens.

We were sent other items which we used to make a pirate island, a treasure hunt and a spyglass. It's provided us with a Summer of fun and games, exploring history and adventure. It's also given me huge idea for The Boy's birthday party next Summer!

We were provided with these items for the purpose of this post. Our ideas and opinions are honest and our own.

How To Have A Pirate Treasure Hunt

That Peppa Pig has got a lot to answer for you know! Thanks to her and her friends on Pirate Island, we've had to hold a treasure hunt, although I have managed to stop short of making a metal detector to find treasure in the garden. (Maybe we could pretend there's treasure in the defunct vegetable patch which might convince Mr. TBaM to dig it over?)

If you want to have a treasure hunt, you'll need:

pirate craft

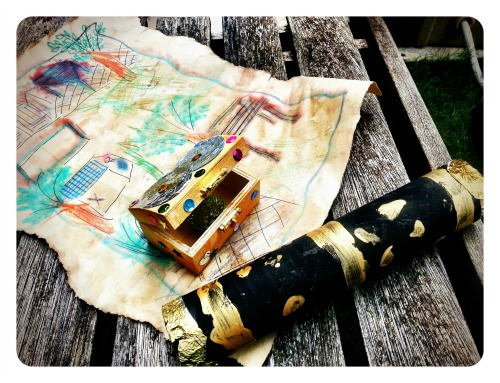
a map, a telescope and a treasure chest…

pirate craft

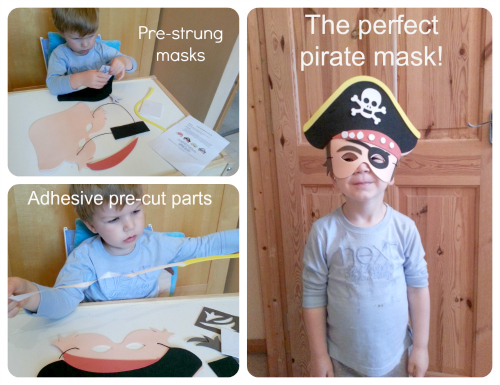
We used these pirate masks which are pre-cut, pre-strung and adhesive.

pirate craft

We used tea bags onto a picture of our garden I'd drawn and The Boy had coloured in. Torn edges make it look more authentic.

pirate craft

And of course, no treasure hunt is complete without a treasure chest and a spyglass to help find the secret stash.

pirate craft

And the reward? The best chocolate coins that mummy can find in August!

I was provided with the linked items by Yellow Moon to see what I could do with them. The ideas and activities are my own.

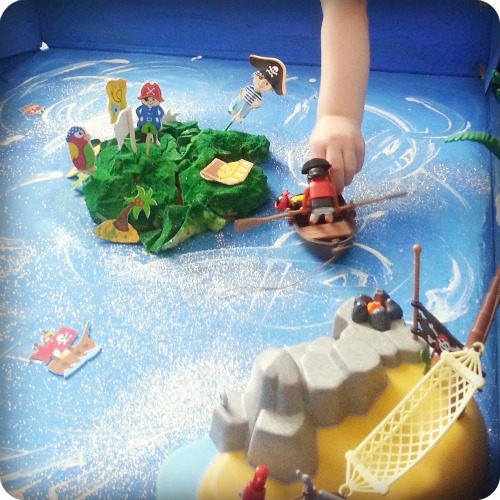
How To Make A Pirate Island

A fortnight ago we took delivery of a new fridge-freezer and with that came a lot of packaging. I managed to rescue some of the cardboard packaging from Mr. TBaM before efficiency really kicked in, and as a result ended up with a large, square, shallow, cardboard box.

It took a while for its future use to come to mind, especially as The Boy kept sitting in it to play with beads or his letter formation tray, but eventually we decided to paint it and turn it into a role-play resource.

You'll need:

  • cardboard box
  • blue, white, green, yellow paint
  • sand
  • glitter
  • a sponge
  • glue, paintbrushes and scissors
  • pictures of pirates, palm trees, parrots, pirate flag, and cocktail sticks

pirate craft

  1. Cut up the sponge roughly and glue it down in the middle of the box to create an island;
  2. Paint the inside of the box blue, we used a few different shades to add some definition;
  3. Create some swirly white lines all over the blue paint to give the impression of waves. We also sprinkled some silver glitter on to add some sparkle to the waves;
  4. Paint the island green, again we used a light and dark. We also created a sandy beach for the pirates to land on by painting a section yellow and sprinkling some sand on while it dried;
  5. We then added some pirate items using themed foam stickers and cocktail sticks. You could easily draw the figures and cut them out, or print them from the Internet, but when life's quite frankly too short for that I've used these*.

When the sponge has completel dried, the stick figures can be really easily moved around the island for imaginative play, especially if there's a mutiny and one is chasing the other for the treasure!We also enlisted the help of some other pirates who rowed alongside to help out Captain PegLeg to sort out his motley crew.

A great activity for art development, fine motor skills, imaginative play and developing oracy.

I was sent the item marked * to see what I'd do with it.


Pre-Literacy Carnival Call-Out

As I've mentioned before, I'm not sending The Boy to state nursery for his free 15 hours. I know, shock horror right? There is a good reason for this, several in fact which are far too boring, convoluted and not important at the moment.

However, what it does mean is that I want to be sure that I'm doing the best that I can to get him ready for Reception next September. And this is where I'm going to do something that I don't tend to do very often on this blog; I'll don my teacher hat, draw upon my experience as a Literacy co-ordinator and come up with a bank of pre-school activities that focus on developing pre-Literacy skills.

Pre-Literacy skills are vital to ensure that your child is ready to learn how to read and write when they get to school. Don't be in a rush to teach them yourself, that's the point of the teachers who have gone through years of training to ensure they are delivering the best teaching to our children. I've worked in a Reception class and trying to re-teach a child phonics is nigh on impossible. More important for us as parents is to ensure that they have the pre-Literacy skills in place, general things like: fine motor skills development, hand-eye co-ordination and communication. More specifically; sequencing, shape and pattern recognition, letter awareness, positional language, and (for those who are ready) proper pronounciation of phonics.

Next month when the big kids return to school, I want to focus in on these all important skills and create a resource bank for parents like me. This is where I'd like some help please.

If you have a post on your blog about pre-Literacy skills (like the ones listed above) please leave that in the comments box below. If you have any ideas that you'd like to contribute (but no blog posts) leave those in the comments box. I will credit everyone in.

Let's help our children learn through play, let's treasure their childhood and not push them to grow up!


How To Make A Pirate Spyglass

We've been sent a few pirate items to review lately and it's prompted me to have a week of pirate activities. No pirate captain can be taken seriously without a looking glass. It's also the easiest thing in the world to make!

What you'll need to make a pirate spyglass:

  • a kitchen towel roll
  • black paint
  • gold paint
  • gold foil
  • metallic decorating pens *
  • paintbrushes
  • glue

pirate party craft

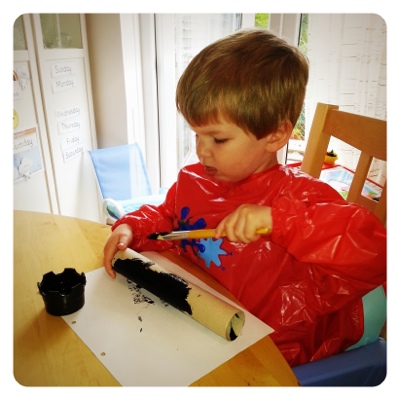
  1. Paint the tube black and leave to dry.
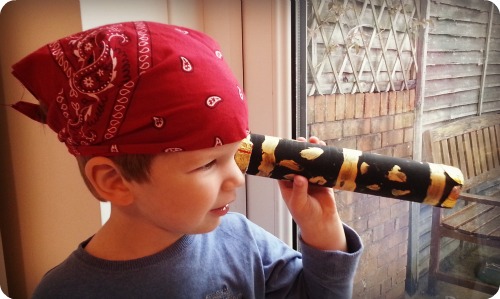
  2. Paint three gold rings around the tube, an inch from each end and one in the middle. This will help it look like it's one of those sliding ones. Use the metallic pens* to dot gold and silver patches over the other sections for some extra 'pirate bling'.
  3. Once dry, glue around the very tip of each end and cover with gold foil. Leave enough to foil to bend over and glue on the inside of the tube; we don't want scratched faces or eyes!

If you want to see another brilliant pirate spyglass, nip over and check out this 'How To' from the marvellous pirate mummy, Multiple Mummy.

I was sent the item marked * by Yellow Moon to see what I could do with it.

I'm going to be sharing a few pirate activies this week. If you've got anything pirate that you'd like to share, please add it to the linky below to create a great reference for me and others.


Learning Through Play: Sand Drawing

The Boy is becoming more and more curious about letters. He's desperate to know what they are called, he's practising the names and sounds that he's familiar with all the time, he's trying to form the shape of them in the air and finding letters he knows in books. I'm going to start focusing on the key letters and playing bingo games involving them because he just wants to learn!

One of the best ways to learn numbers and letters is through play. And one of the best ways to practise the formation of them is through play as well. The key point to note is that if littlies can't do it on a large scale, they can't do it on a small scale. So if they can't form the shape of letters in the air or a variety of other ways, then they won't be able to do it with a crayon on paper.

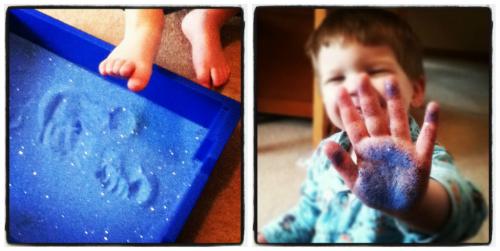
So we've been practising our pre-writing skills in a tray of coloured sand, to which I added glitter to make it more sparkly and attractive.

pre-writing

We explored the texture of the sand, making hand and foot prints.

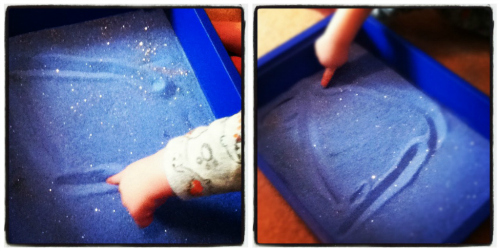
We've been practising our shapes, squares are easy but triangles are tricky!

pre-writing

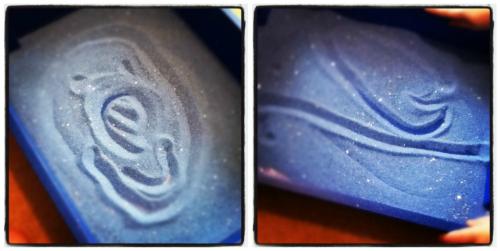
We drew faces and numbers.

learning through play

Before we moved onto drawing letters. Initially, I drew the letters in the sand while he watched me. Then he held my hand while I drew them so he could feel the flow of the shape, then I drew them and he drew over the top of my letter. next he progressed onto drawing them himself. The hardest part in all of this was that, because The Boy is left-handed, I had to reverse it and draw it with my left hand myself!

Forming letters in sand in a big tray is one of the activities that is frequently used in my school in both nursery and reception. As I've said before, until they can do it on a large scale, the smaller and more accurate writing doesn't happen. And we should be encouraging them to draw zigzag, wavy, curved and straight lines, as these are the shapes of our alphabet.

Other good materials to do this with are wood shavings or sawdust, shaving foam and that weirdy bath jelly gloop stuff. Anything that holds the shape once a finger has been drawn through it.

I bought my coloured sand from e-Bay.

Sciencesparks3

How To Paint Monet's Waterlillies With Children

The rather inspiring RedTedArt has started a new project up and it is one that I was happy to jump on board with straightaway. She would like us to investigate the Great Artists with our children and see what art work we can help them create based on the painting that we've explored.

I've discussed this with Maggy and her plan is not to set a theme or artists to study each time, apart from the first post where she's intending to give us the suggestion of Jackson Pollock. He's a bit modern and out there for me and I wasn't initially bitten by this idea, but since she suggested it I've thought some more and will join in. However, there is one that screamed out loud to me that I had to pick as my first project and Maggy approved.

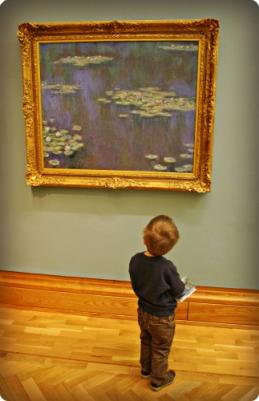
You see in the National Museum of Wales' art gallery is this beauty:

Monet's waterlillies for children

How on earth could I refuse the call of an original Monet?

And so a few weeks ago we popped into Cardiff on the train, trekked over to the museum and sat down and read Laurence Anholt's children's book about Monet: The Magical Garden of Claude Monet. It was incredibly quiet there that day, just a few 'ladies what lunch' having a saunter, and an elderly, deaf attendant who watched us reading and looking at the painting before coming over to chat to us.

The Boy loved looking at the painting but the magnificence and significance of it, and his surroundings completely escaped him. Because let's face it, he's two and it's just some splodges of paint really.

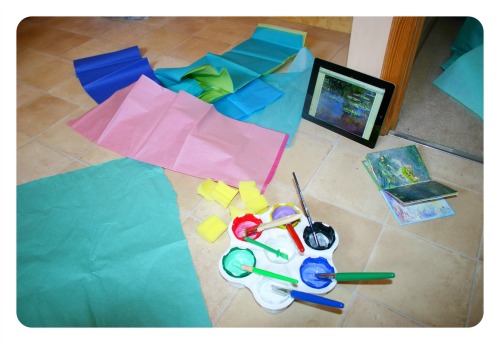
However, since then, he hasn't stopped 'reading' the book to himself and chatting about when we went to the museum. Admittedly, sometimes he's waffling on about the dinosaurs we saw, but generally the event sunk in. And so on the weekend we settled down in the kitchen with a plethora of materials and an image of the painting (thank you iPad).

Monet's waterlillies for childrenAs a class teacher, art lessons consist of me pointing to the art cupboard and the different paper types on the shelf and allowing the children to select for themselves. The Boy is two so I'd provided him with a selection of paint colours, paper colours and types for him to choose from, but I was still controlling the materials. As he gets older, he'll have more choice.
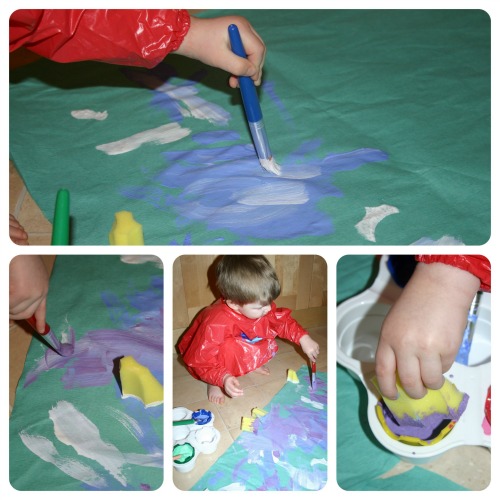
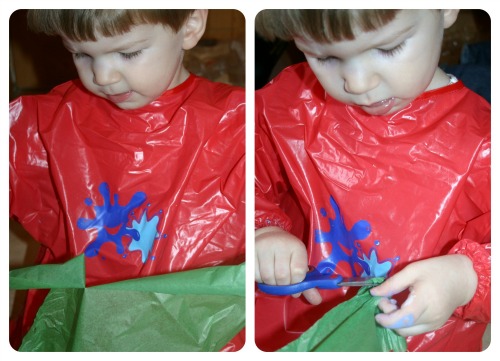
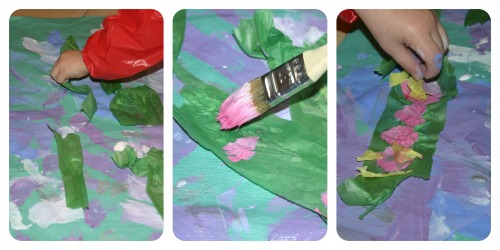
We discussed the colours in the painting, the brush strokes and what he could see. Then he had a go himself.

Monet's waterlillies for children

He experimented with different brush strokes and use of the sponge.

Monet's waterlillies for children

He got to practise his scissor, and ripping, skills.

Monet's waterlillies for children

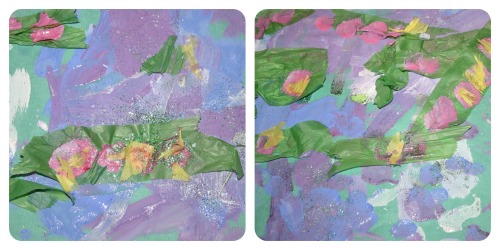
He used collage materials for the leaves and then painted the lillies on top.

Monet's waterlillies for childrenAnd then, because Monet didn't have it but we both know he'd have used it if he could have, we sprinkled on glitter to make the water sparkle!
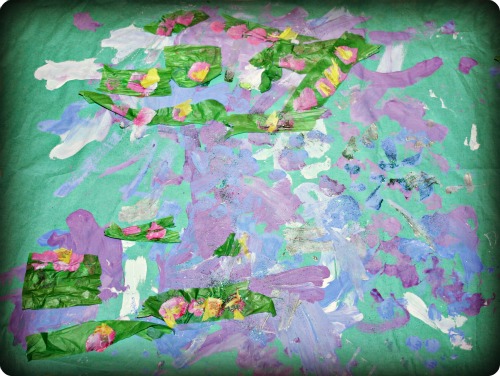
Monet's waterlillies for children

What do you think of our masterpiece?

I'm linking this up to RedTedArt's Great Artists.

Red Ted Art

Related Posts Plugin for WordPress, Blogger...