Pipecleaner Space Hat

I have never understood the appeal of pipecleaners. They bend and make cool shapes, but for a pre-schooler I've always thought they were a little pointless and hard work.

And then I discovered (via Pinterest) a few activities which suggest that they can be used as a tool in threading and beading exercises.

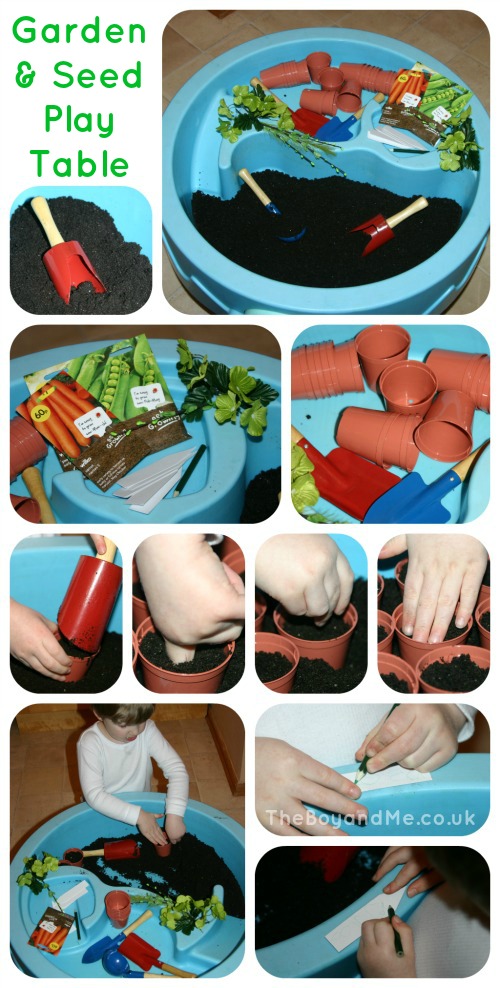
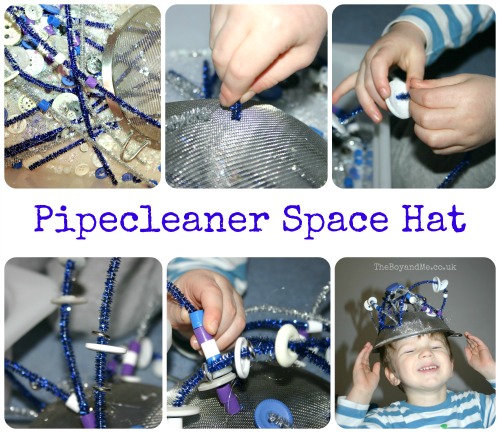
I set out a tray of materials for The Boy as an invitation to explore and play.

We used:

  • metallic coloured pipe cleaners
  • buttons of various sizes
  • maxi Hama beads
  • a metal sieve
  • silver confetti strands

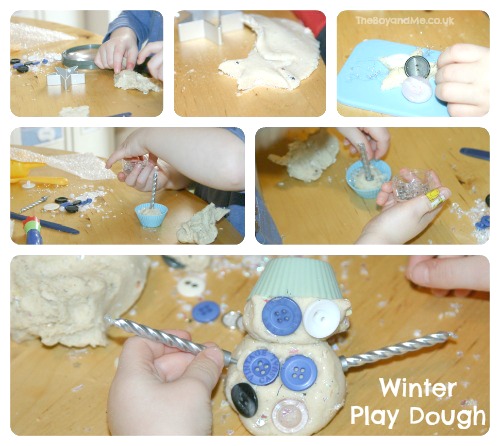
The pipecleaners are much easier to use for threading than a shoelace as they stay rigid and don't flop over while trying to fit the beads onto the end. This also makes them easier to shape when creating a design. One more bonus is that the metallic fibres covering the wire enable beads to stay in place and not slip down to the end.

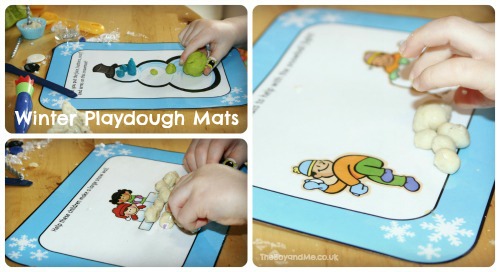
We started by poking the wire end into the sieve and bending it over 'inside' to prevent it from being pulled out. Then The Boy was keen to have a mismatch of buttons and Hama beads on the pipecleaners, alternating and contrasting the design. Buttons that have multiple holes are really useful to thread two pipecleaners through. To ensure the buttons and beads didn't fall off, we tucked the loose end back into the sieve and bent the end over again.

Threading with pipecleaners

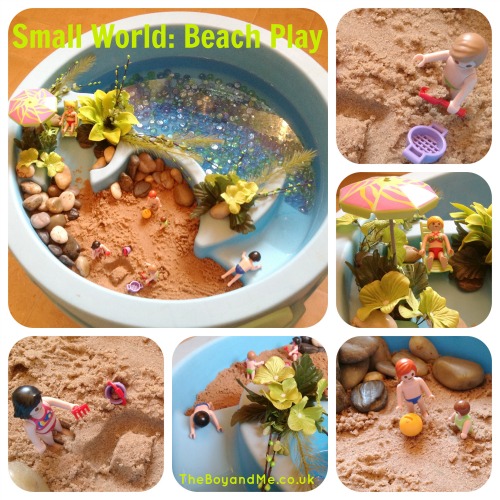
Threading is an excellent activity for pre-school children as it helps to develop fine motor skills, hand to eye co-ordination and the pincer grip; all of which are needed to develop pre-writing skills. Pipecleaners are a very useful tool for threading because of their rigidity.

And it's great fun too!

Gardening Play Table

Before The Boy was born, I was a keen gardener (albeit slightly lazy on the maintenance side) and I'd achieve good results. Unfortunately I haven't grown any vegetables in three years now, but this is the year to change this as The Boy is so interested in where fruit and vegetables come from and how they grow. Understanding 'the world around us' is a part of the Early Years Foundation Stage framework and I'm keen to give him activities for contextual and experiential learning as much as possible.

With this in mind, and because it was freezing and I didn't want to stand in the garden in 1°C, I set up a gardening play table for him in his seconded water table.

We used:

  • seeds (carrot and peas)
  • soil
  • plastic pots (I've used the degradable compost pots before but they never seem to work very well and these are reusable)
  • a range of tools (I always provide a range of equipment whatever activity so that he learns which are the best tools for the job)
  • paper markers and a pencil (writing opportunities)

children's gardening

He was so keen to get to work and plant the seeds; we had a huge discussion about the differences between a carrot and a pea seed, why the carrot seeds didn't look like a carrot when the pea seed looked like a pea, how the plant would grown, where the vegetable would grow and how big they would be. I can't wait to see his face when the pods start to grow on the pea plants. I've always found pea plants quite high maintainence for very little result, but the look on a child's face when they pop open a pod and see the peas nestled inside is worth it.

One of the things that I was very pleased with was seeing him write the labels for the seeds. I wrote one out so he could see how to shape the letters, but as he hasn't practised many letters outside of his name before I wasn't sure he'd manage it. He studied how I wrote the letters, followed my instructions and wrote them really well. This is a great excuse to get some pre-literacy mark-making practise in without him even realising!

Sciencesparks3

Winter Play Dough

Play dough is a basic toy and craft item for all pre-schoolers. How many of us spend hard-earned pounds buying the badly spelt version in cute little plastic tubs? You know the bright yellow tubs with an impossible lid to remove? The stuff that gets stuck into carpets, clothes, hair, eyes, etc. and dries out within half an hour if not replaced to the safety of the tub? And that you then curse because you'll need to find another fiver to replace?

Two years ago I discovered that play dough can be made easily and cheaply, and the version that I use from The Imagination Tree lasts for ages in the fridge (my last batch lasted for eight months!). The Imagination Tree has a variety of recipes available but I prefer this no-cook play dough recipe, and so does my husband who does the washing up!

Winter Play Dough

Basic Recipe:

  • 2 cups plain flour (I use the value range)
  • 2 tablespoons vegetable oil
  • ½ cup salt
  • 2 tbsp cream of tartar (a powder which comes in pots like baking powder)
  • 1 cup of boiling water (you made need to add more. Anna recommends up to 2, but I always need to add more flour, so start with less)
  • few drops glycerine (optional adds more shine!)
  • Extras:
    • white glitter
    • silver glitter
    • silver star confetti
    • white foil confetti
    • peppermint essence

Other equipment:

  • snowflake, snowmen and star cutters
  • Winter-coloured beads and string
  • magnifying glass
  • bubble wrap
  • sequins and beads
  • stampers, moulds
  • cake cases and birthday candles

I gave The Boy a tray full of goodies and the mound of play dough and waited to see what would happen; it wasn't long before he was exploring the texture and shapes with the bubble wrap and the magnifying glass.

play dough activities

It wasn't long before he was doing his James Martin impression though and baking me cookies and a cake, glad to see I've trained him well. And of course, no Winter Play Dough activities would be complete without the obligatory snowman!play dough activities

I'd seen some play dough mats on the Internet, but most of those designed for Winter also encompass Christmas or Thanksgiving, so I decided to make my own with invitations to play and design on them.

play dough activities

You can download a copy of these winter playdough mats here.

Small World: Beach Play

Whistling against the double-glazed doors, the wind howled around the garden searching for an outlet. It found its victim in the lone toy lying on the patio; the Step 2 water table, abandoned since the last warm day of Summer, rolling around the concrete slabs.

Irritating the hell out of me!

Which was the point that I summoned my husband to, "just do something with it, will you?!"

And then I glanced down at the Pinterest board that I had open displaying a plethora of play ideas. Many of them use exactly the same water table that was in danger of being outcast at that very moment. Mr. TBaM was informed to bring it in and clean it off and an idea started taking shape in my mind.

The Boy loves playing with his water table, and he loves playing at the beach. It's slightly Arctic at the moment and as much as I'm happy to chant the mantra, 'There's no such thing as bad weather, just bad clothing!', after a while it turns into a lie; it's really cold at Barry Island at this time of year!

The Boy and I (see I'm capable of the correct grammar when necessary) nipped to a pound shop earlier and picked up a bunch of fake flowers, glass pebbles, stone polished pebbles and Blu-Tack. While he was napping this afternoon, I got busy creating him his own indoor lagoon to play with.

imaginative play

I filled the top section of the water table with sand and the lower level with water, to which I added a few drops of blue food colouring. The glass pebbles in the base help to give the 'sea' more of a ripply effect and are more colourful. They're also lovely to play with in the water.

The fake flower heads were removed, as were a variety of the leaves, and I pushed the plastic stalk into a ball of Blu-Tack which adheres well to the tub and manages to withstand water splashed quite well. I covered up the base of the Blu-Tack with smaller leaves of small pebbles. The polished stones were laid around the edges of the sand to resemble rockpools, and I created a sunlounger haven in the area where the water-wheel normally stands. Finally I added his Playmobil figures in different poses.

He was over the moon when he came downstairs to play with it, and got stuck straight in making sandcastles and diving the figures into the sea.

imaginative play

This table has proven to be a great resource for the play and I've got a whole range of other ideas to try out with it. Small World play is brilliant for pre-schoolers as it allows them to make sense of the world in which they live by acting out known situations, and exploring others with safety and guidance from the supervising adult.

It helps to develop oracy, fine motor skills and the imagination. What better excuse for playing?

Pre-School Science: Absorption & Colour-Mixing

I first saw this idea on the marvellous Pinterest, and it originally came from a children's Australian TV Programme.

As far as The Boy was concerned we were about to perform magic, but then what else is Science if not a complete and utter mystery. It is to me anyway! So I posed him a question, showed him the equipment and waited to see what he'd say.

How can we make the coloured water travel from one glass to another, without touching it?

You'll need:

  • equal quantities of blue and yellow food colouring (although any two primary colours will work)
  • two glasses half-filled with water
  • one empty glass
  • two sheets of kitchen towel (absorbent but those with thirst pockets might not let it drip out again!)
  • two spoons for stirring
  1. Place the three glasses in a row with the empty one in the middle.
  2. Pour yellow food colouring into one end glass, and blue into the other end glass. Give them a stir with separate spoons so as not to mix the colours prematurely.
  3. Fold the kitchen towel strips into quarters, lengthways.
  4. Place one strip into the yellow food colouring and one into the blue. Fold the free end over into the empty glass in the middle and tuck it down to the side so they aren't touching.
  5. Wait and watch the results!

Colour-mixing

The Science Bit:

Kitchen towel is highly absorbent and the coloured water travels up the kitchen towel slowly defying gravity. It happens due to a force called 'capillary action'; a force of attraction between the paper fibres and the water. How does the water actually move up through the paper towel? The water is pulled up into the open spaces between the fibres in the paper, soaking the paper as it absorbs the water. When the weight of the water in the paper is equal to the upward attraction, then the water stops rising. In this case, gravity kicks in and because the kitchen towel is hanging down, the coloured water drips down into the empty glass.

The colour-mixing is basic science: blue and yellow makes green; red and blue would make purple; and yellow and red would make orange.

(In actual fact, The Boy asked what blue and red would make, and is desperate to try it out. I'd have obliged, but I'd bought up all the blue food colouring in our town yesterday with our playdough and preparing this!)

Colour-mixing

The end result is absolutely fascinating, even Mr. TBaM was enthralled.

Tuesday Tots

fun sparks badge

How To Make A Snow Picture

The Boy loves doing large scale art and when the snow fell earlier in the week, it was the perfect opportunity to get creative again. His recent painting sessions have shown that he is really keen to express himself artistically and so I wanted to allow him the freedom to make whatever picture he saw fit. I gave him the resources and let him get on with it.

We used:

  • A2 mounting card (equally could have used a cardboard box cut up)
  • various coloured paint
  • a variety of sponges and paintbrushes of different sizes and textures
  • silver, blue and white glitter
  • cotton wool
  • metallic white, foil confetti
  • glue
  • bubble wrap
  • coloured pompoms
  • talcum powder

You could also use:

  • tissue paper
  • clear cellophane

How To Make A Snow Picture 1

It's at this point that we talked about how he could use the different materials, it was the bubble wrap that really captured his attention. We popped a load of bubbles talked about what it felt like, looked like and how when it was stretched out it looked like a load of balls. At this point it was laid over the card and The Boy commented on how it looked like snow balls. He decided to paint a garden scene (is this one of the first pictures that they like to paint at this age? It's his most common scene for paintings!) and he set to painting with the grass and the sky.

The thing that often amuses me about infant painting is the way that the sky never reaches the ground, to them it's way above their heads and as they can't see the blue around them why would they paint it down there? The other thing that amazes me is how The Boy has always painted grass as blades of grass, never once has he painted a swishy mass for the ground. He normally wants to paint mud but was distracted on this occasion!

How To Make A Snow Picture

I framed it using a child-friendly picture frame from Ikea which has plastic 'glass' (although I've actually left this out because the painting is so 3D), and I've hung it in The Boy's bedroom for him to enjoy. As the seasons change, we'll do an updated picture to reflect the changes in nature.

Playing With Ice

On Friday afternoon I was feeling a little low and wishing that I could have gone to the thanksgiving service of a friend, when inspiration hit me. As a former science teacher and co-founder of Science Sparks, Kerry loved making it easier for children to understand science and so I felt what better way to honour that, than get to grips with a science 'experiment' with The Boy.

I'd seen this activity on Pinterest which, while intended for Christmas, gave a great bank of ideas for playing with kitchen and craft materials to see what happens. I prepared the activity while The Boy napped and then we were ready to have fun with some ice!

I used a takeaway container and filled it with water, food colouring, glitter, sand, and sequins and then placed it in the freezer. When it was set I removed it and placed it into a tray, giving The Boy a pot of table salt and rock salt, a spoon and a water spray bottle.

playing with ice 1

He had brilliant fun making holes in the ice block with the salt and the jet of water. After a while the salt dissolved into the water and ran down the side of the block causing channels to be melted in. The Boy spotted these and picked off the ice crystals. The look of wonder on his face when he held the ice crystals in his hand, and they then subsequently melted, was amazing; sheer amazement!

Following on from this we decided to make some coloured ice cubes using food colouring. I used ice cube bags for this as I wanted to try and get the food colouring to slowly merge with the water creating ice cubes of slightly different shades. I filled the ice cube bags with water first, then inserted a straw and poured the food colouring down the straw.

coloured ice cubes

Once these had frozen, I again gave The Boy the tray with the coloured ice cubes, table salt, rock salt and a water spray bottle. The effects were even more immediate because the ice cubes were smaller and therefore melted more quickly.

playing with ice

He was fascinated with the ice crystals that were formed by the salt water solution melting the ice, and kept pouring more and more salt onto one red ice cube to try and create a hole through the middle of it. We discussed what coloured water would appear once the ice melted, and we talked about where the salt had gone. We then discussed the colour of the water once all three different coloured ice cubes had melted and mixed together.

Science Sparks has got a fantastic selection of ice play activities which are great fun for this time of year.

Christmas Sensory Box (Learning Through Play)

It's been a while since I did a sensory box for The Boy (our Autumn one went mouldy when Nana put the lid on the wet conkers) so I decided to create an exploratory festive box for him.

Sensory tray

I used:

  • white rice coloured with red food colouring and baked in the oven for 90 minutes on 90°C
  • cinnamon sticks
  • pine cones
  • red and gold glitter
  • red sand
  • orange slices painted gold
  • gold sequins and jewels
  • a variety of shiny gold and red items; straw circles, jingle bells, chocolate coin covers
  • ground ginger sprinkled all over.

The best bit of this is giving The Boy a magnifying glass and encouraging him to explore the 'buried treasure'. Sensory boxes are great for fine motor skills development and encourage exploration and communication. The Imagination Tree is the grand master of sensory trays and exploratory boxes.

Festive Jar Lights

Candles and lanterns are an obligatory part of Christmas decorations, and after our success at making a stained-glass window picture, we decided to make our own lantern using the same technique.

You'll need:

  • a jar
  • PVA glue
  • coloured tissue paper
  • black paper or card
  • scissors
  • pencil
  • candle

Christmas craft

  1. Draw out the outline of your design onto black card (the festive jar lights template is here).
  2. Cut out the parts that will be let the light through.
  3. Glue coloured tissue paper to the reverse side and leave to dry.
  4. Wrap it around a jar and glue it into place, I used a small amount of sellotape to help hold it in place.
  5. Place a tealight candle insight, rest on a heatproof mat and light the candle. (Never leave a child unattended with a lit candle, or leave a candle burning unattended).

christmas crafts

'Counting Down To Christmas' is a craft bloggers link-up held each week in the eight weeks preceeding the big day itself. Each week we will be posting a different Christmas craft activity.

Rainy Day Mum ~ The Boy and Me ~ The Madhouse ~ Here Comes the Girls


Christmas Tree Stained-Glass Window

A few months ago I posted about our stained-glass butterfly picture and it proved very popular with both The Boy and people reading my blog. The picture stayed up until a month ago when the tissue paper had faded too much to be effective.

We've made a Christmas tree version for the festivities and I wanted to share it.

Christmas tree

You can find a christmas tree stained glass window template here if interested.

Related Posts Plugin for WordPress, Blogger...